Installation
This section provides instructions for installing the Apptrove Unity SDK in your Unity project, enabling tracking of user interactions and campaign analytics for Android and iOS platforms.
Prerequisites
-
Unity Editor 2019.4 or later
-
A Trackier MMP account with access to the Trackier Panel
-
Basic knowledge of Unity project management
-
Internet connection for downloading the SDK package
Add Apptrove SDK to Your App
To integrate the Apptrove Unity SDK, download and import the SDK package into your Unity project.
Step 1: Get the SDK
-
Download the latest Apptrove Unity SDK package (version 1.6.57 or later) as a .unitypackage file.
Step 2: Import the SDK
-
Open your Unity project in the Unity Editor.
-
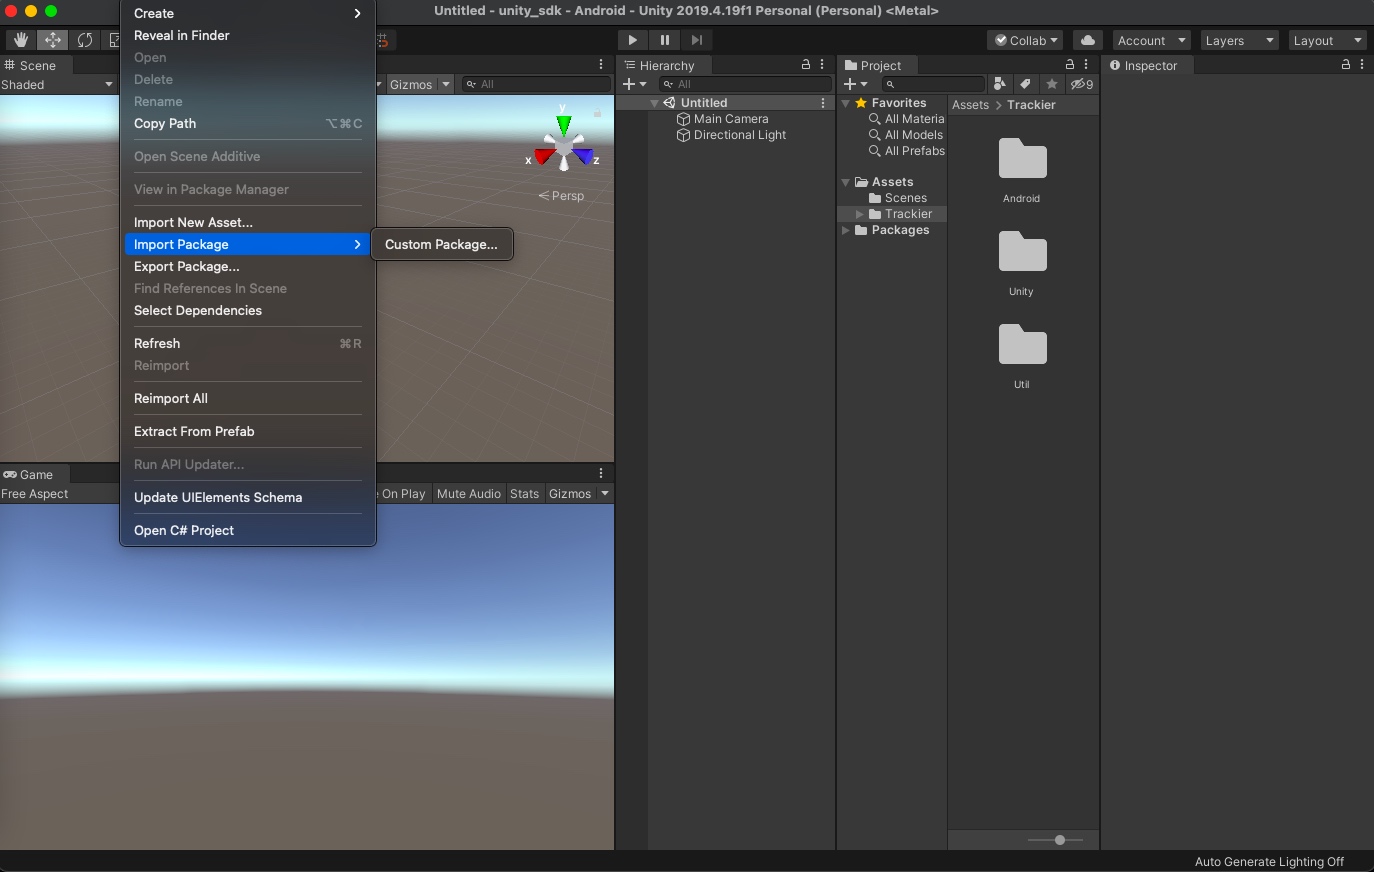
Navigate to Assets → Import Package → Custom Package.
-
Select the downloaded .unitypackage file and click Open.
-
In the import dialog, ensure all assets are selected and click Import.
Expected Outcome
After importing, a Trackier folder will appear in the Assets directory, containing the Trackier.cs file and other SDK components.
Best Practices
-
Use the Latest SDK Version: Download the most recent SDK version from the releases page to ensure compatibility and access to new features.
-
Backup Your Project: Save a backup of your Unity project before importing the SDK to prevent data loss.
-
Verify Import Success: Check the Assets directory for the Trackier folder and ensure no import errors appear in the Unity Console.
-
Use Version Control: Commit changes to a version control system (e.g., Git) before and after importing the SDK.
Troubleshooting
-
Package Import Fails:
-
Re-download the .unitypackage file from the releases page to ensure it's not corrupted.
-
Confirm your Unity Editor version is compatible (2019.4 or later).
-
-
Trackier Folder Missing:
-
Re-import the package via Assets → Import Package → Custom Package.
-
Check the Unity Console for import-related errors.
-
For further assistance, refer to the Trackier Documentation Portal or contact Trackier support at support@trackier.com.