Installation
Choose your SDK version below:
- Apptrove SDK → Recommended for all projects (Latest: v2.x.x)
- Trackier SDK → Will be deprecated in August 2026 (v1.x.xx)
Use the tabs below to view installation instructions for your chosen SDK.
This section provides detailed instructions for installing the Apptrove React Native SDK in your React Native project, enabling tracking of user interactions, attribution, and campaign analytics for Android and iOS platforms. The installation process involves adding the SDK package, installing dependencies, and configuring platform-specific settings to support features like Google Advertising ID.
Prerequisites
- React Native 0.60 or later
- Node.js and npm for package management
- A Apptrove MMP account with access to the Apptrove Panel
- For Android:
- Android API 21 (Android 5.0) or later
- Gradle for dependency management
- For iOS:
- iOS 10.0 or later
- Xcode 12.0 or later
- CocoaPods for dependency management
- Internet connection for downloading the SDK package
Add Apptrove SDK to Your App
To integrate the Apptrove React Native SDK, install the SDK package using npm and configure dependencies for both Android and iOS platforms.
Step 1: Install the SDK Package
- Open a terminal in your React Native project root directory.
- Run the command for your chosen SDK (see tabs below).
- ✓ Apptrove SDK (Recommended)
- Trackier SDK (Deprecating August 2026)
npm install react-native-apptrove
Package Information:
- NPM Package: react-native-apptrove (check npm for latest)
- Installation Command:
npm i react-native-apptrove
Package: react-native-apptrove · Use the latest v2.x version for Apptrove SDK.
Trackier SDK will be deprecated in August 2026
Please migrate to Apptrove SDK before August 2026.
npm install react-native-trackier
Alternatively, install from the GitHub repository:
npm install trackier/react-native-sdk
Package Information:
- NPM Package: react-native-trackier
- Installation Command:
npm i react-native-trackier
Package: react-native-trackier · Latest v1.x (deprecating August 2026).
Step 2: Install iOS Dependencies
For iOS, install CocoaPods dependencies to ensure the SDK integrates correctly.
- Navigate to the
iosfolder in your project directory:
cd ios
- Install CocoaPods dependencies:
pod install
- Return to the project root directory:
cd ..
Expected Outcome
The SDK will be added to your project's node_modules, and iOS dependencies will be installed in the ios/Pods directory. The project is now ready for platform-specific configurations.
Update Android Configuration
To support tracking features like Google Advertising ID, configure your Android project with the necessary dependencies and permissions.
Step 1: Add Google Advertising ID Dependency
- Open the
android/app/build.gradlefile. - Add the Google Play Services Ads Identifier dependency to the
dependenciessection:
dependencies {
    implementation 'com.google.android.gms:play-services-ads-identifier:18.0.1'
}
Step 2: Update Gradle Properties (if needed)
If your project uses a Gradle version lower than 7.0, update the android/gradle.properties file to include the following line to ensure compatibility:
android.jetifier.blacklist=moshi-1.13.0.jar
Step 3: Update Android Manifest
- Open the
android/app/src/main/AndroidManifest.xmlfile. - Add the following permission to support devices running Android 12 or later:
<uses-permission android:name="com.google.android.gms.permission.AD_ID"/>
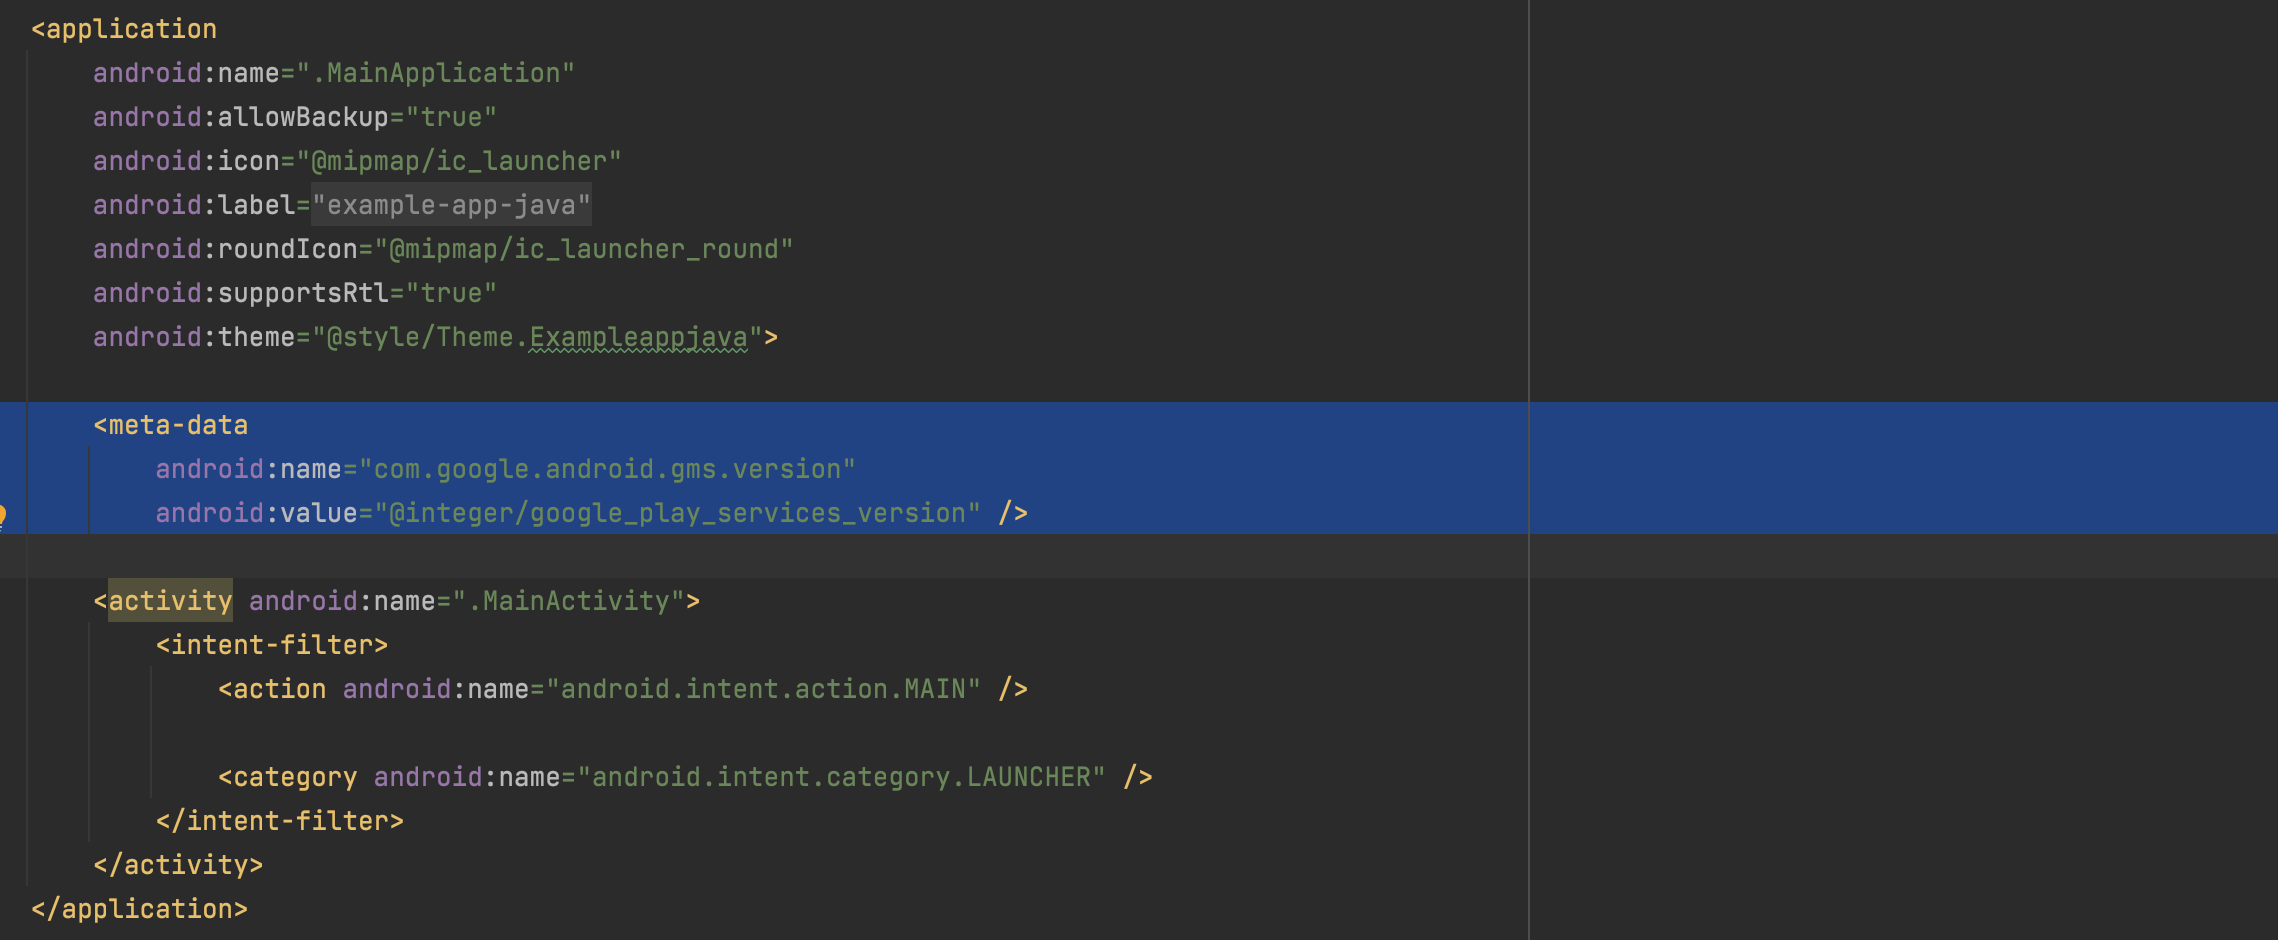
- Add the Google Play Services version meta-data inside the
<application>tag (if not already present):
<meta-data
    android:name="com.google.android.gms.version"
    android:value="@integer/google_play_services_version" />
Step 4: Sync Gradle
- Open the
androiddirectory in a terminal:
cd android
- Run the following command to sync the project with the updated Gradle configuration:
./gradlew cleanBuildCache
- Return to the project root directory:
cd ..
Update iOS Configuration
The React Native SDK README specifies only CocoaPods installation for iOS. Additional configurations (e.g., Info.plist updates for permissions) are not detailed. Provide specific details to refine this section.
To ensure proper iOS integration, verify the CocoaPods setup and apply any necessary project configurations.
Step 1: Verify CocoaPods Installation
- Confirm that the
pod installcommand completed successfully, creating aPodfile.lockfile in theiosdirectory. - Open the
.xcworkspacefile in Xcode (not.xcodeproj) to build the iOS project.
Step 2: Add iOS Permissions (if applicable)
Add specific iOS configurations (e.g., NSUserTrackingUsageDescription for App Tracking Transparency) if required.
- Open the
ios/[YourAppName]/Info.plistfile in Xcode or a text editor. - Add any required permissions, such as:
<key>NSUserTrackingUsageDescription</key>
<string>We use tracking data to improve your app experience.</string>
- Save the file and rebuild the iOS project.
Best Practices
- Use the Latest SDK Version: Regularly check for updates to your Apptrove React Native SDK package on npm to ensure compatibility and access to new features.
- Backup Your Project: Save a backup of your React Native project before installing the SDK to prevent data loss.
- Verify Dependency Installation: Confirm that the SDK exists in
node_modulesand that iOS Pods are installed correctly. - Test Platform Configurations: Build and test on both Android and iOS to ensure the SDK and Google Advertising ID configurations work as expected.
- Secure Manifest Files: Store
AndroidManifest.xmlchanges in version control and avoid exposing sensitive data.
Troubleshooting
- NPM Installation Fails:
- Ensure you have an active internet connection and the correct npm version.
- Run
npm cache clean --forceand retry the install command for your chosen SDK package.
- CocoaPods Installation Fails:
- Verify that CocoaPods is installed (
pod --version) and up to date (gem install cocoapods). - Check for errors in the terminal output during
pod installand resolve dependency conflicts.
- Verify that CocoaPods is installed (
- Google Advertising ID Not Retrieved:
- Confirm the
com.google.android.gms:play-services-ads-identifierdependency is correctly added inbuild.gradle. - Ensure the
com.google.android.gms.permission.AD_IDpermission is included inAndroidManifest.xmlfor Android 12+ devices.
- Confirm the
- Build Errors on Android/iOS:
- Check Gradle sync errors in Android Studio or terminal output.
- For iOS, ensure you're opening the
.xcworkspacefile in Xcode. For further assistance, refer to the Apptrove Documentation Portal or contact support at support@apptrove.com.