Installation
Choose your SDK version below:
- Apptrove SDK → Recommended for all projects (Latest: v2.x.x)
- Trackier SDK → Will be deprecated in August 2026 (v1.x.xx)
Use the tabs below to view installation instructions for your chosen SDK.
This guide provides step-by-step instructions to integrate the Apptrove iOS SDK into your iOS application using CocoaPods or Swift Package Manager. Choose the installation method that best suits your project.
Prerequisites
- iOS 10.0 or later
- Xcode 12.0 or later
- CocoaPods (for Option 1) or Swift Package Manager support (for Option 2)
- A Trackier MMP account with an SDK key
- Access to your project's
Podfile(for CocoaPods) or Xcode project settings
Installation
Choose one of the following installation methods:
Option 1: CocoaPods
Add Apptrove SDK via CocoaPods
To integrate the Apptrove iOS SDK, configure your Podfile to include the SDK dependency.
- ✓ Apptrove SDK (Recommended)
- Trackier SDK (Deprecating August 2026)
1.1 Update the Podfile
In your project's Podfile, add the following line:
pod 'apptrove-ios-sdk'
Package Information:
- CocoaPods Package: apptrove-ios-sdk
- Installation Command:
pod 'apptrove-ios-sdk' - Version: 2.x.x (latest)
Trackier SDK will be deprecated in August 2026
This is the final version. Please migrate to Apptrove SDK before August 2026.
1.1 Update the Podfile
In your project's Podfile, add the following line:
pod 'trackier-ios-sdk'
Package Information:
- CocoaPods Package: trackier-ios-sdk
- Installation Command:
pod 'trackier-ios-sdk' - Version: 1.x.xx (latest legacy)
1.2 Install Dependencies
Run the following command in the terminal from your project directory:
pod install
1.3 Open the Workspace
Open the generated .xcworkspace file in Xcode to build and run your project.
1.3 Open the Workspace
Open the generated .xcworkspace file in Xcode to build and run your project.
1.4 Import SDK
Import the SDK in your Swift files:
- ✓ Apptrove SDK (Recommended)
- Trackier SDK (Deprecating August 2026)
- Swift
- Objective-C
import apptrove_ios_sdk
@import apptrove_ios_sdk;
import trackier_ios_sdk
If you're new to CocoaPods, refer to the official CocoaPods documentation for guidance on creating and using Podfiles.
Option 2: Swift Package Manager
The Apptrove iOS SDK supports Swift Package Manager (SPM) for dependency management.
- ✓ Apptrove SDK (Recommended)
- Trackier SDK (Deprecating August 2026)
- Swift
- Objective-C
Step 1: Add Package Dependency
1.1 Open Xcode Package Dependencies
- Open your project in Xcode
- Go to File → Add Package Dependencies...
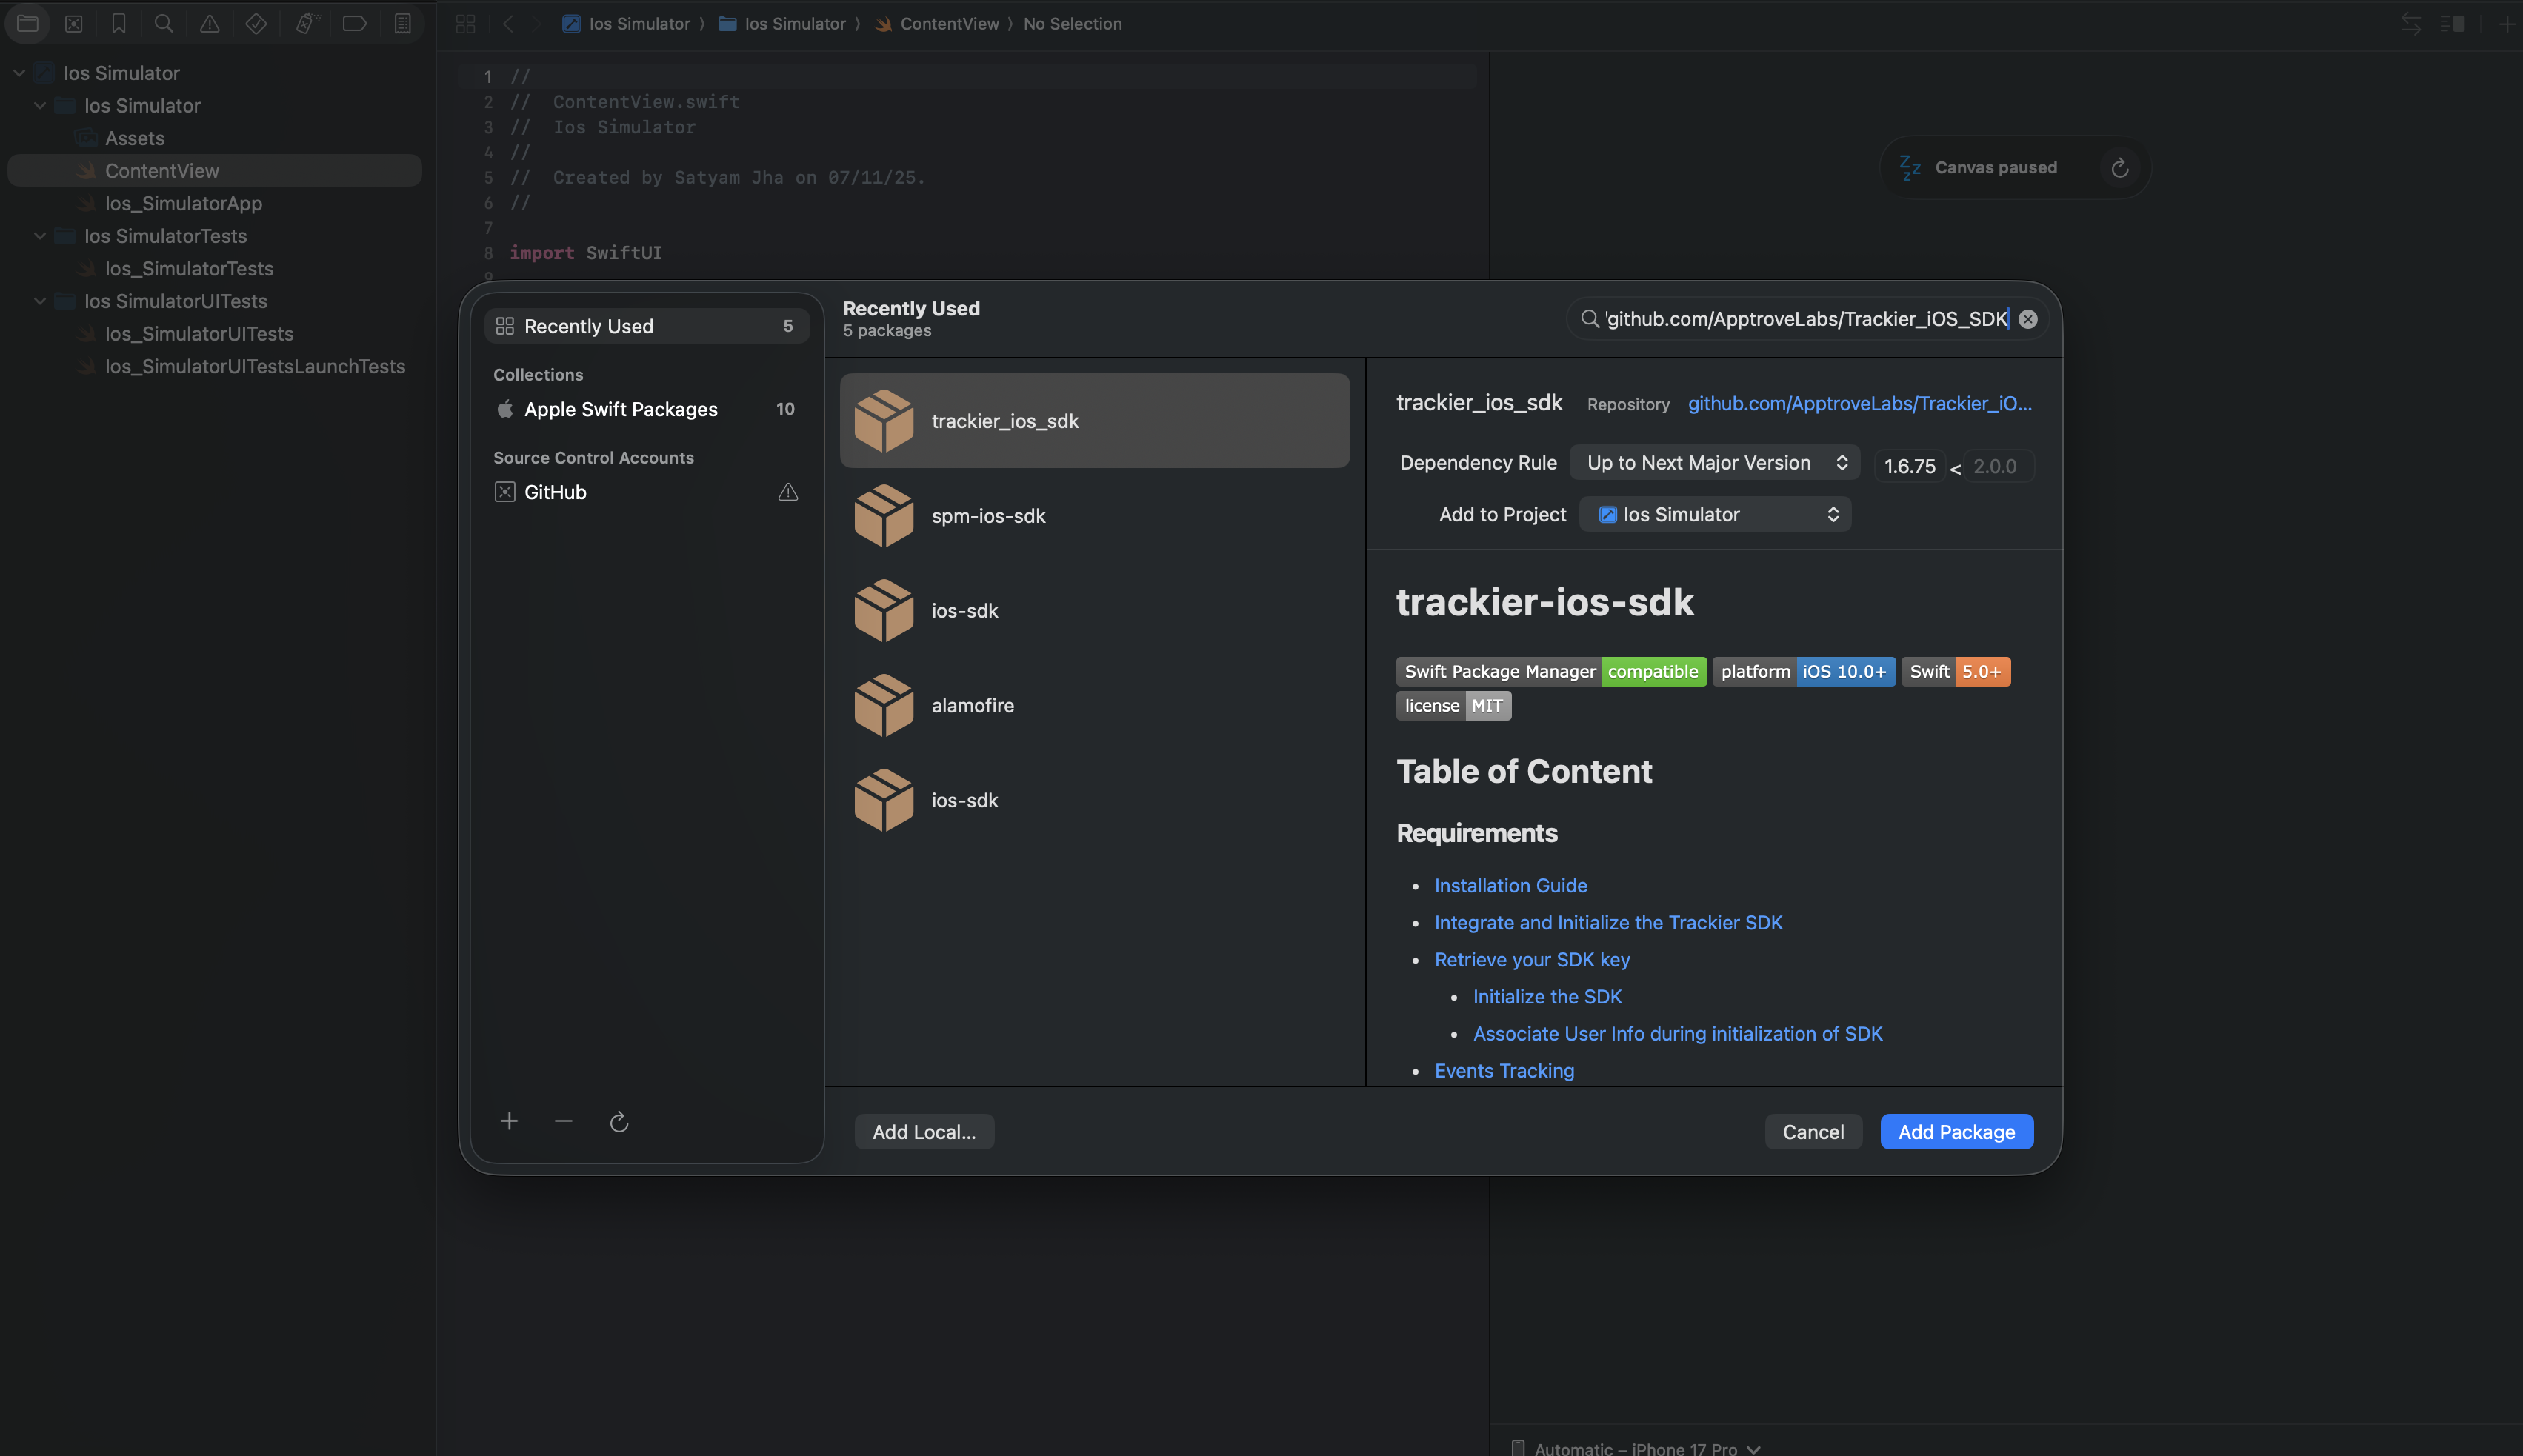
1.2 Enter Repository URL
Enter the repository URL:
https://github.com/ApptroveLabs/Trackier_iOS_SDK.git
- Select the version rule (e.g., "Up to Next Major Version" with 2.x.x)
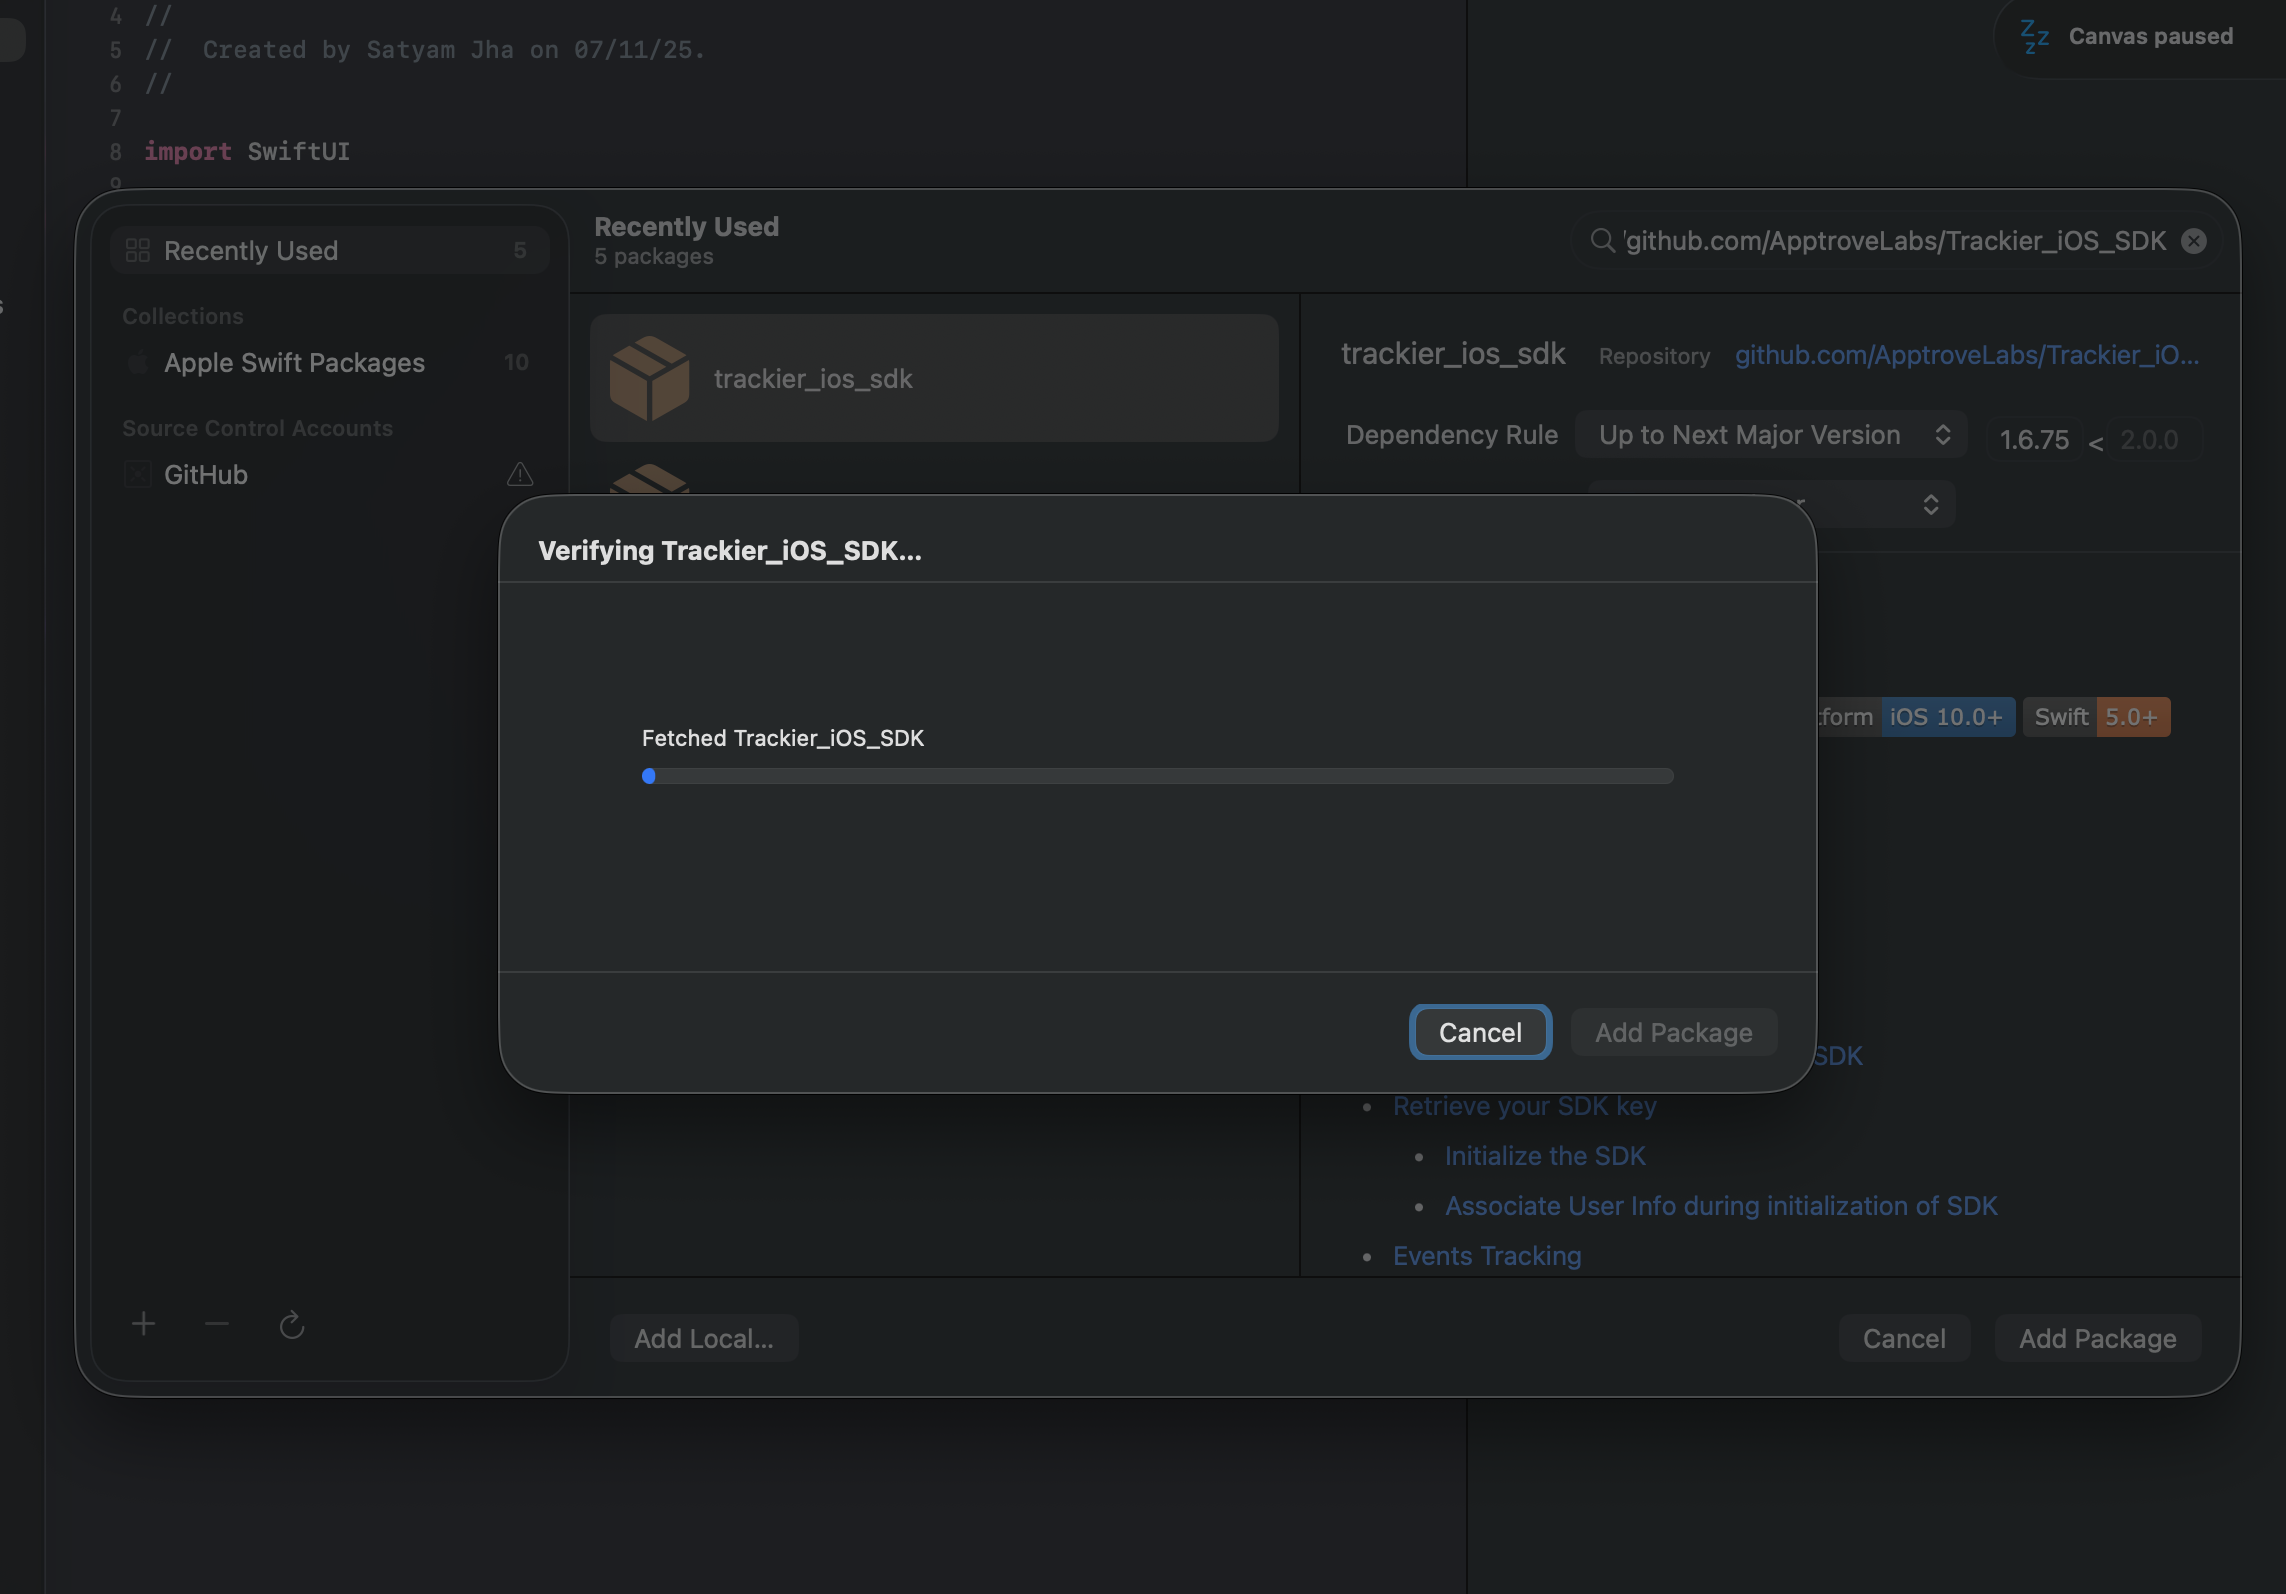
- Click "Add Package"
Xcode will verify the package:
1.3 Add SDK Product to Target
- Select the ApptroveSDK product and add it to your target
- Click "Add Package" again to confirm
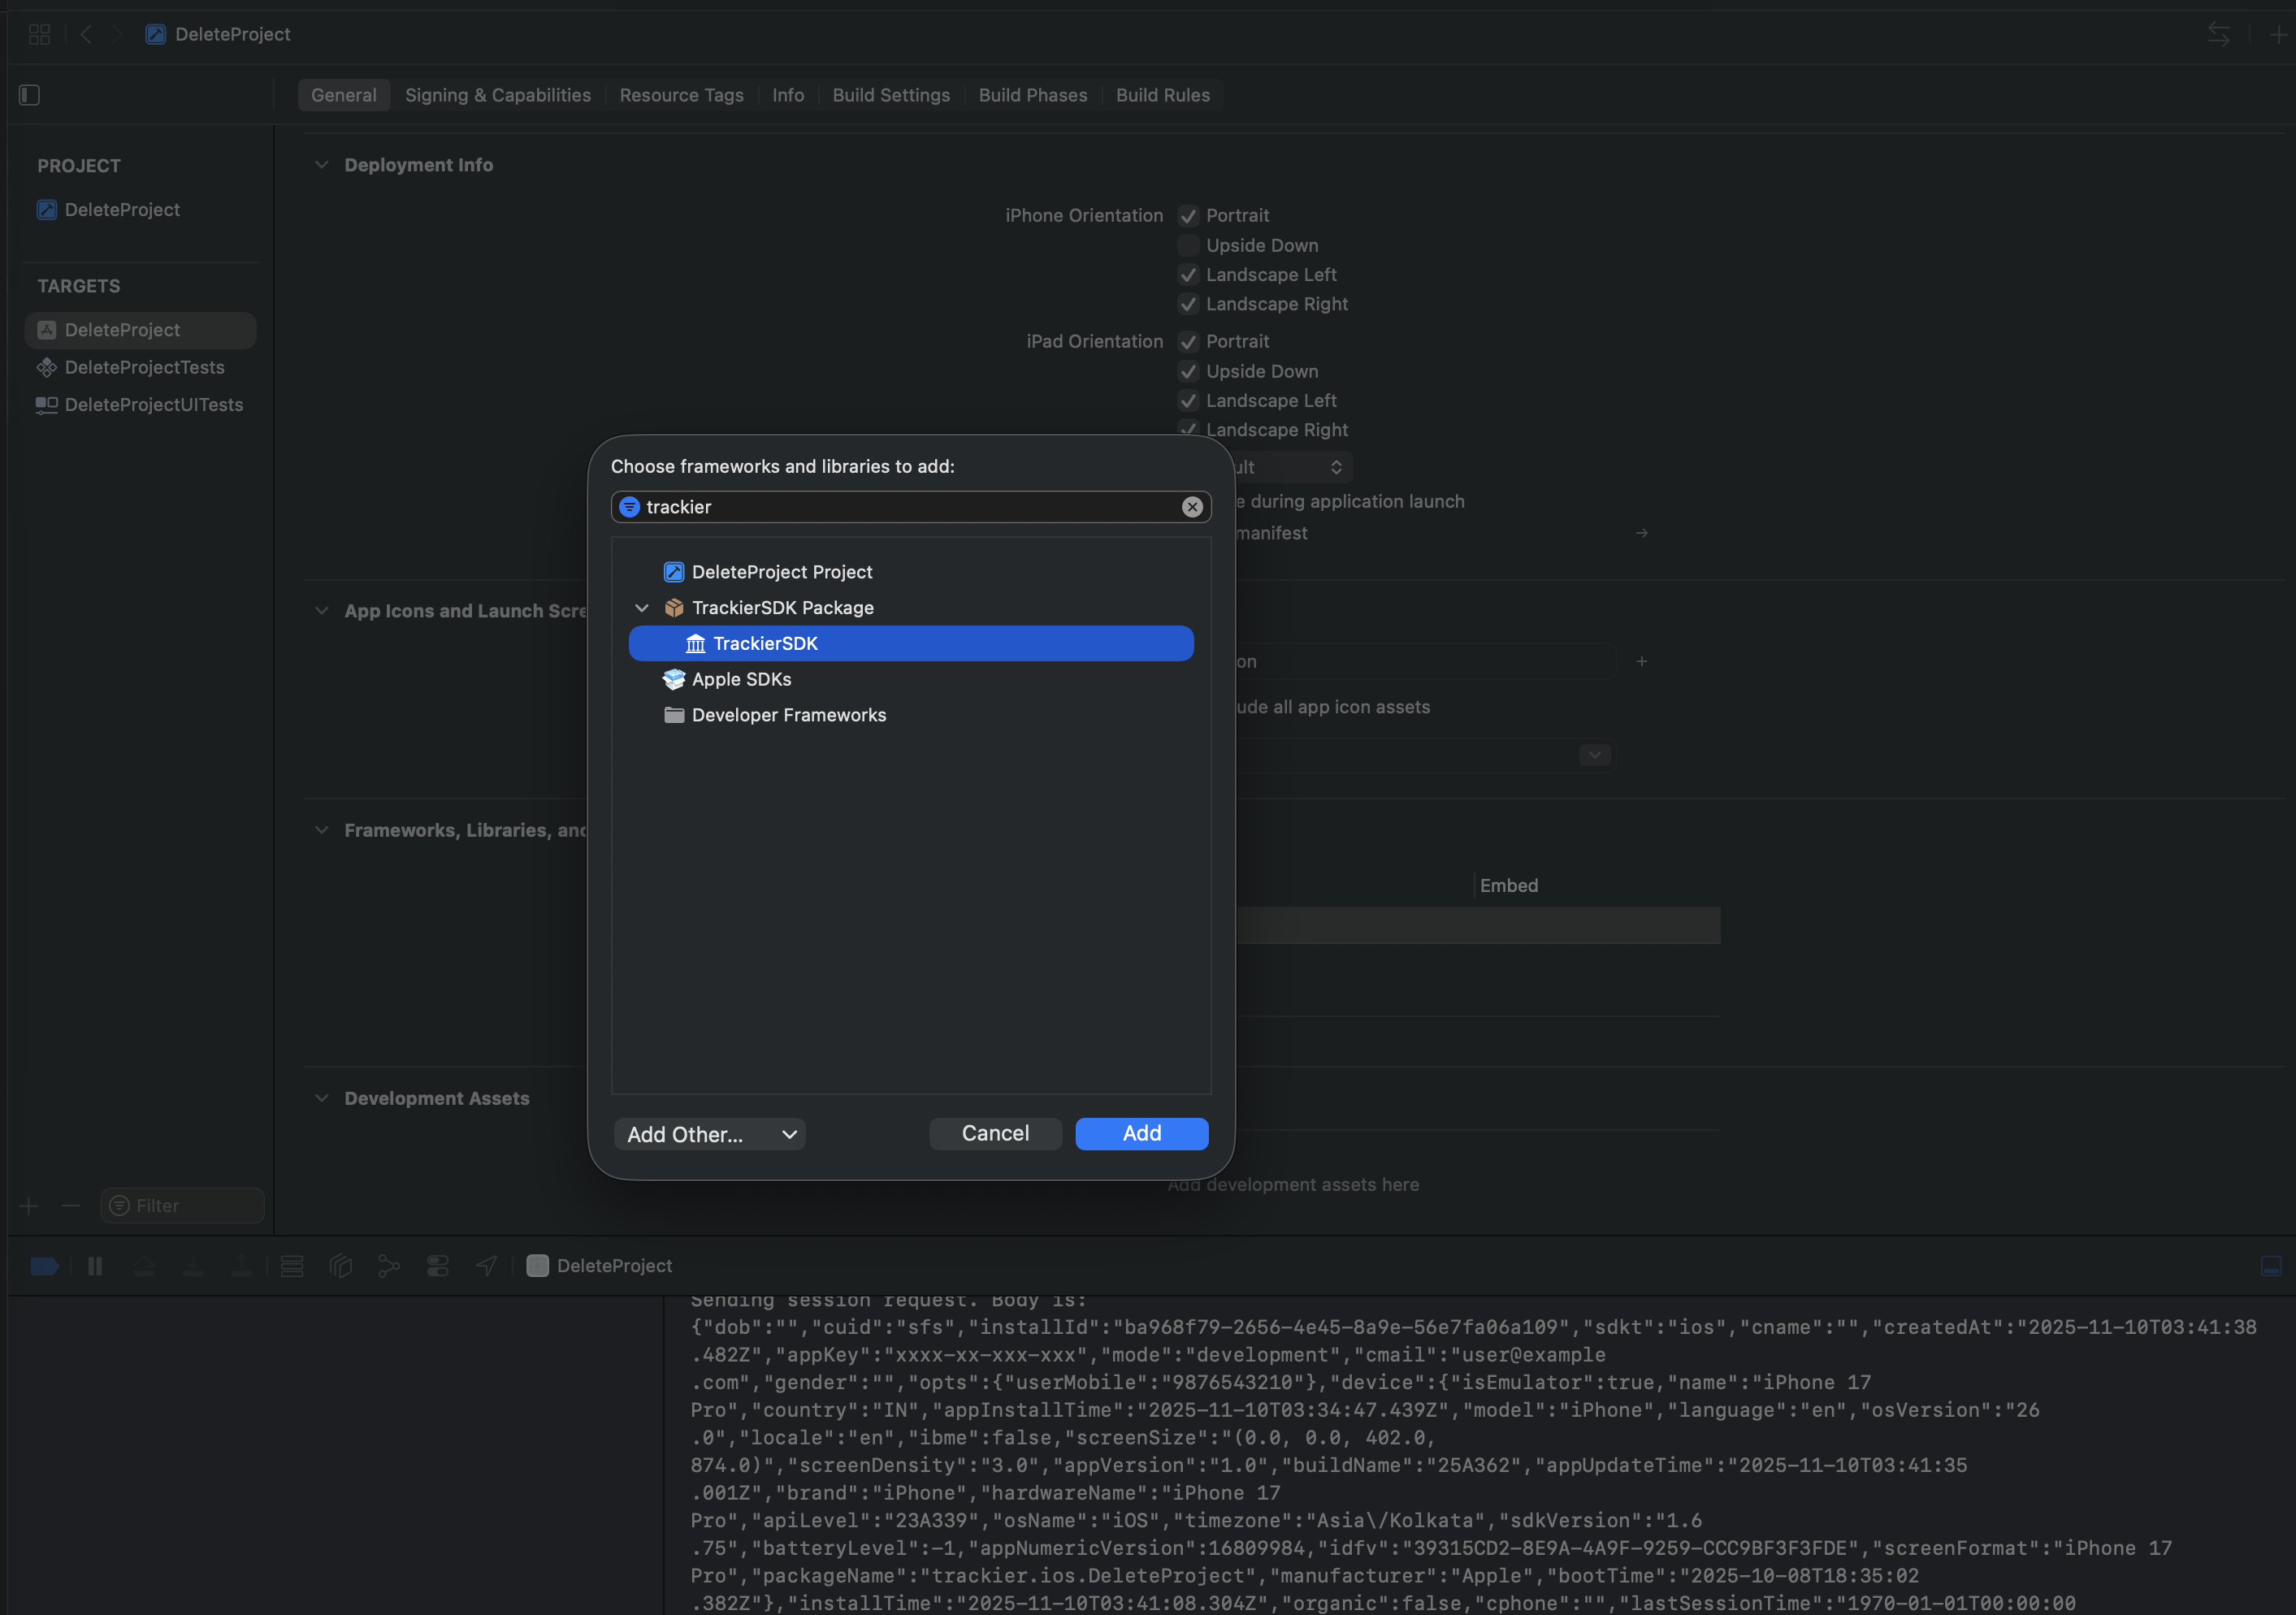
Step 2: Add Framework to Target
After adding the package, you need to link the framework:
2.1 Open Project Settings
- Open your project in Xcode
- Select your project in the navigator (top-level item)
- Select your target (e.g., "iOS Simulator")
- Go to "General" tab
- Scroll to "Frameworks, Libraries, and Embedded Content"
2.2 Add ApptroveSDK Framework
- Click the "+" button
- Search for ApptroveSDK
- Select ApptroveSDK and click "Add"
2.3 Verify Framework Integration
Verify that ApptroveSDK appears in the frameworks list:

Step 3: Import SDK in Your Code
After successful installation, import the SDK in your Swift files:
import ApptroveSDK
- GitHub Repository: https://github.com/ApptroveLabs/Trackier_iOS_SDK.git
- Version: 2.x.x (latest)
- License: MIT
@import ApptroveSDK;
For Objective-C, CocoaPods (pod 'apptrove-ios-sdk', 2.0.6+) is recommended.
Trackier SDK will be deprecated in August 2026
This is the final version. Please migrate to Apptrove SDK before August 2026.
Step 1: Add Package Dependency
1.1 Open Xcode Package Dependencies
- Open your project in Xcode
- Go to File → Add Package Dependencies...
1.2 Enter Repository URL
https://github.com/ApptroveLabs/Trackier_iOS_SDK.git
- Select the version rule (e.g., "Up to Next Major Version" with 1.x.x)
- Click "Add Package"
Xcode will verify the package:
1.3 Add SDK Product to Target
- Select the TrackierSDK product and add it to your target
- Click "Add Package" again to confirm
Step 2: Add Framework to Target
After adding the package, you need to link the framework:
2.1 Open Project Settings
- Open your project in Xcode
- Select your project in the navigator (top-level item)
- Select your target (e.g., "iOS Simulator")
- Go to "General" tab
- Scroll to "Frameworks, Libraries, and Embedded Content"
2.2 Add TrackierSDK Framework
- Click the "+" button
- Search for TrackierSDK
- Select TrackierSDK and click "Add"
2.3 Verify Framework Integration
Verify that TrackierSDK appears in the frameworks list:
Step 3: Import SDK in Your Code
After successful installation, import the SDK in your Swift files:
import TrackierSDK
- GitHub Repository: https://github.com/ApptroveLabs/Trackier_iOS_SDK.git
- Version: 1.x.xx (latest legacy)
- License: MIT
Example Application
For a sample implementation, refer to the Example directory in the Apptrove iOS SDK GitHub repository. To explore the example project:
- Clone the repository:
git clone https://github.com/trackier/ios-sdk.git - Navigate to the
Exampledirectory - Open the project in Xcode
- For CocoaPods: Run
pod installand open the.xcworkspacefile - For SPM: The dependencies will be automatically resolved by Swift Package Manager
- For CocoaPods: Run
Next Steps
After completing the installation:
- Initialize the Apptrove SDK in your app.
- Test your integration to ensure proper tracking of installs and events.
- Contact Apptrove support at support@apptrove.com for assistance.
For the latest version of the Apptrove iOS SDK and additional resources, visit the Apptrove Documentation Portal.