Overview
Choose your SDK version below:
- Apptrove SDK → Recommended for all projects (Latest: v2.x.x)
- Trackier SDK → Will be deprecated in August 2026 (v1.x.xx)
Use the tabs below for SDK-specific installation snippets.
SDK-Specific Quick Setup
- ✓ Apptrove SDK (Recommended)
- Trackier SDK (Deprecating August 2026)
npm install apptrove-expo-sdk
import { AppTroveConfig, AppTroveSDK, AppTroveEvent } from 'apptrove-expo-sdk';
{
  "expo": {
    "plugins": ["./node_modules/apptrove-expo-sdk/app.plugin.js"]
  }
}
npm install trackier-expo-sdk
import { TrackierConfig, TrackierSDK, TrackierEvent } from 'trackier-expo-sdk';
{
  "expo": {
    "plugins": ["./node_modules/trackier-expo-sdk/app.plugin.js"]
  }
}
This guide provides step-by-step instructions to install the Apptrove Expo SDK into your Expo application. It covers adding dependencies, configuring platform-specific settings, and setting up support for Google Advertising ID and deep linking.
Installing the SDK
Install the Expo SDK using your preferred method: Via npm, or yarn.
Method 1: Install using npm
To install the SDK, run the following command in your project root:
- ✓ Apptrove SDK (Recommended)
- Trackier SDK (Deprecating August 2026)
npm install apptrove-expo-sdk
npm install trackier-expo-sdk
Package Information:
- ✓ Apptrove SDK (Recommended)
- Trackier SDK (Deprecating August 2026)
- NPM Package: apptrove-expo-sdk
- Installation Command:
npm i apptrove-expo-sdk
- NPM Package: trackier-expo-sdk
- Installation Command:
npm i trackier-expo-sdk
Method 2: Install using yarn
To install the SDK using yarn, run the following command in your project root:
- ✓ Apptrove SDK (Recommended)
- Trackier SDK (Deprecating August 2026)
yarn add apptrove-expo-sdk
yarn add trackier-expo-sdk
Sync your project to download the SDK dependencies.
Platform-Specific Configuration
Android Configuration
To support tracking features like Google Advertising ID, configure your Android project with the necessary dependencies and permissions.
Step 1: Add Google Advertising ID Dependency
Expo provides built-in plugin support for auto-linking libraries. For Google Mobile Services (GMS), add the Trackier plugin to your app.json file:
- ✓ Apptrove SDK (Recommended)
- Trackier SDK (Deprecating August 2026)
{
  "expo": {
    "plugins": [
      "./node_modules/apptrove-expo-sdk/app.plugin.js"
    ]
  }
}
{
  "expo": {
    "plugins": [
      "./node_modules/trackier-expo-sdk/app.plugin.js"
    ]
  }
}
After adding the plugin, run the following command to auto-link the GMS dependency:
npx expo prebuild
The GMS dependency will be automatically added to your android/app/build.gradle file:
dependencies {
    implementation "com.google.android.gms:play-services-ads-identifier:18.2.0"
}
After running npx expo prebuild, the GMS dependency will be automatically linked via Gradle. You can verify this by checking the android/app/build.gradle file.
Step 2: Update Gradle Properties (if needed)
If your project uses a Gradle version lower than 7.0, update the android/gradle.properties file to include the following line to ensure compatibility:
android.jetifier.blacklist=moshi-1.13.0.jar
Step 3: Update Android Manifest
In your android/app/src/main/AndroidManifest.xml file, add the following permission to support devices running Android 12 or later:
<uses-permission android:name="com.google.android.gms.permission.AD_ID"/>
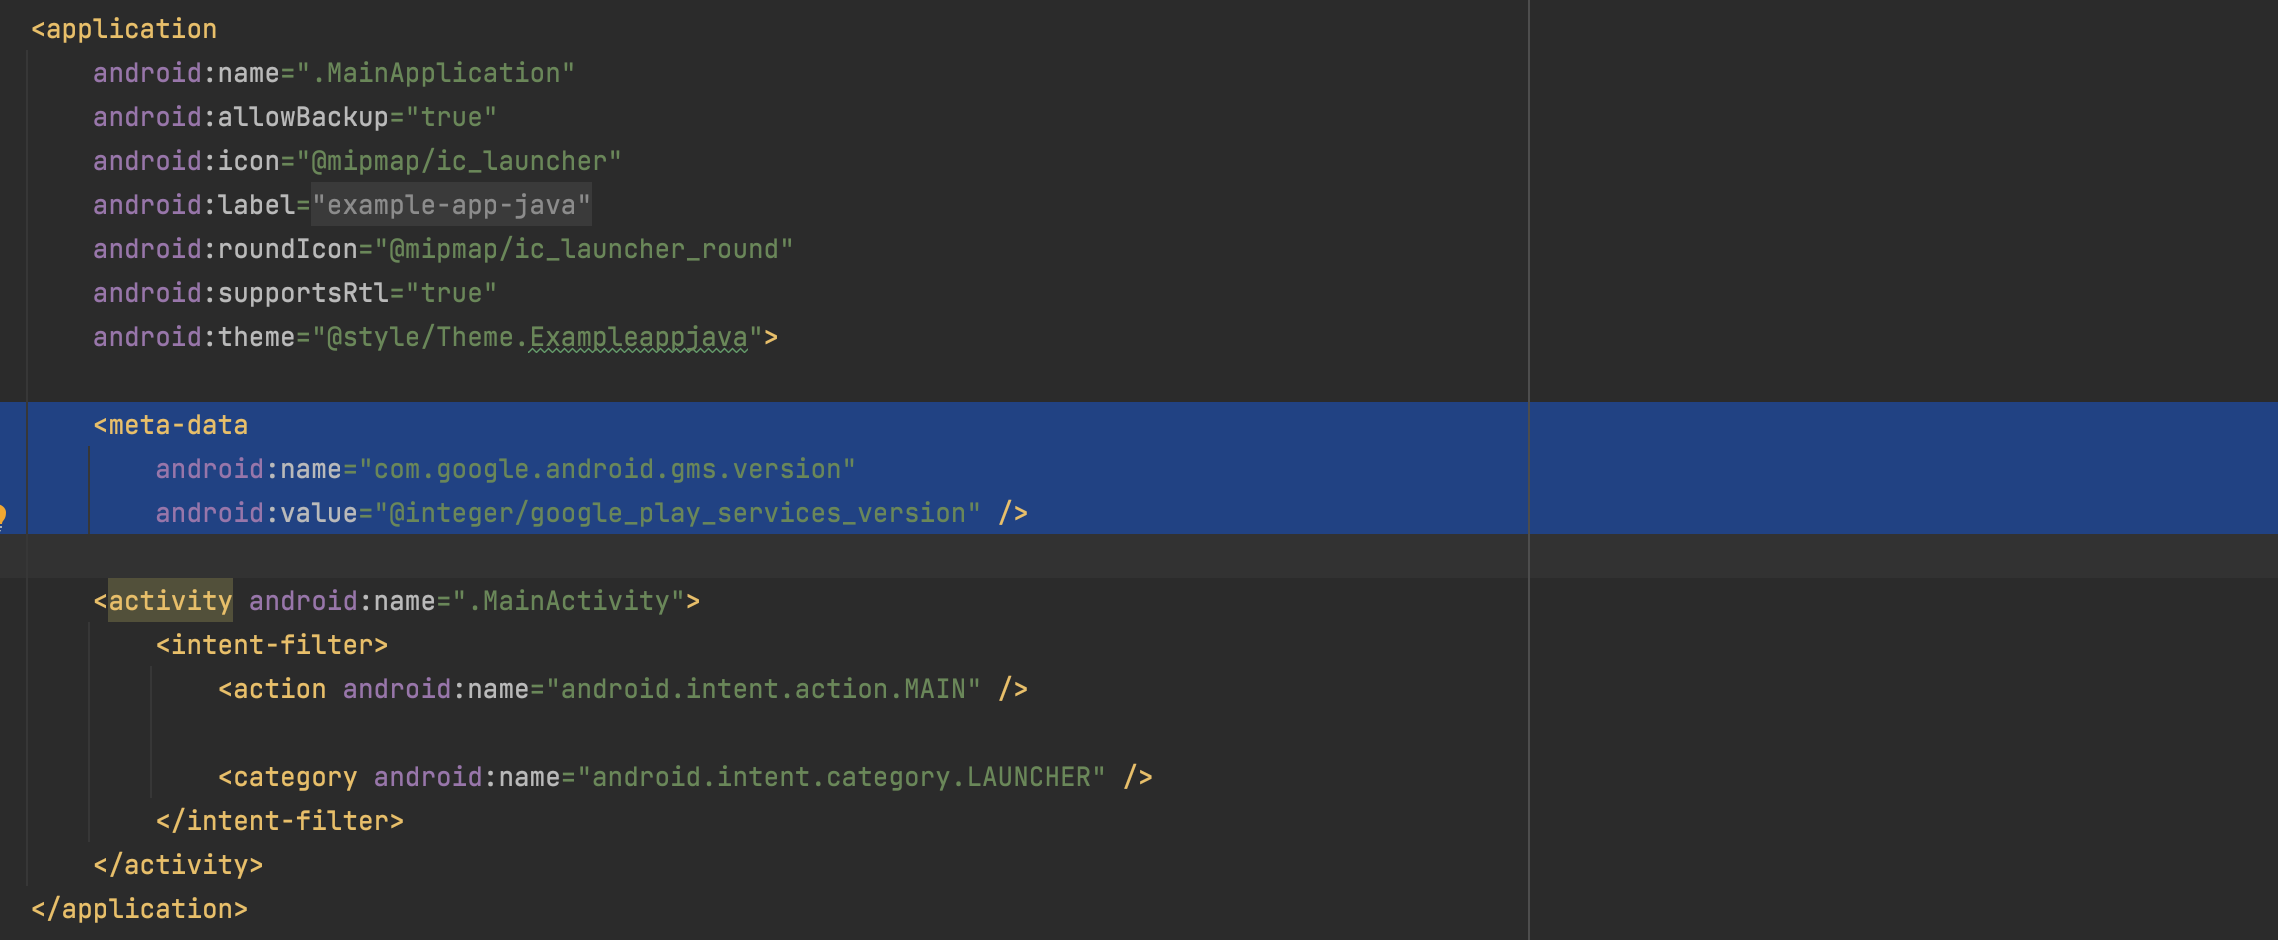
Add the Google Play Services version meta-data inside the <application> tag (if not already present):
<meta-data
    android:name="com.google.android.gms.version"
    android:value="@integer/google_play_services_version" />
Step 4: Sync Gradle
Run the following command to sync the project with the updated Gradle configuration:
cd android && ./gradlew cleanBuildCache && cd ..
iOS Configuration (Bare Workflow Only)
For iOS in bare workflow, install CocoaPods dependencies to ensure the SDK integrates correctly.
Step 1: Install iOS Dependencies
Navigate to the ios folder in your project directory and install CocoaPods dependencies:
cd ios && pod install && cd ..
Step 2: Add iOS Permissions (if applicable)
Open the ios/[YourAppName]/Info.plist file in Xcode or a text editor and add any required permissions:
<key>NSUserTrackingUsageDescription</key>
<string>We use tracking data to improve your app experience.</string>
Expo Managed Workflow Configuration
For Expo managed workflow, the SDK is automatically configured and no additional setup is required. The SDK will work out of the box with Expo's build system.
ProGuard Configuration
If your app uses ProGuard for code optimization, add the following rules to your ProGuard configuration file (e.g., proguard-rules.pro) to prevent the removal of required classes:
- ✓ Apptrove SDK (Recommended)
- Trackier SDK (Deprecating August 2026)
-keep class com.apptrove.sdk.** { *; }
-keep class com.google.android.gms.common.ConnectionResult {
    int SUCCESS;
}
-keep class com.google.android.gms.ads.identifier.AdvertisingIdClient {
    com.google.android.gms.ads.identifier.AdvertisingIdClient$Info getAdvertisingIdInfo(android.content.Context);
}
-keep class com.google.android.gms.ads.identifier.AdvertisingIdClient$Info {
    java.lang.String getId();
    boolean isLimitAdTrackingEnabled();
}
-keep public class com.android.installreferrer.** { *; }
-keep class com.trackier.sdk.** { *; }
-keep class com.google.android.gms.common.ConnectionResult {
    int SUCCESS;
}
-keep class com.google.android.gms.ads.identifier.AdvertisingIdClient {
    com.google.android.gms.ads.identifier.AdvertisingIdClient$Info getAdvertisingIdInfo(android.content.Context);
}
-keep class com.google.android.gms.ads.identifier.AdvertisingIdClient$Info {
    java.lang.String getId();
    boolean isLimitAdTrackingEnabled();
}
-keep public class com.android.installreferrer.** { *; }
Next Steps
After completing the installation:
- Initialize the SDK in your app (refer to the Integrate SDK guide)
- Test your integration to ensure proper tracking of installs, events, and other features
- For assistance, contact Apptrove support at support@apptrove.com