Choose your SDK version below:
- Apptrove SDK → Recommended for all projects (Latest: v2.x.x)
- Trackier SDK → Will be deprecated in August 2026 (v1.x.xx)
Use the tabs below to view initialization code for your chosen SDK.
Overview
This guide provides step-by-step instructions to initialize the Apptrove Flutter SDK in your Flutter application. Proper initialization ensures accurate tracking, attribution, and reporting across Android and iOS platforms.
Prerequisites
- A Flutter application with the Apptrove SDK installed
- Access to the Apptrove Panel
- Flutter 2.0 or later, Dart 2.12 or later
- Basic knowledge of Dart and Flutter development
Initialization
Step 1: Retrieve SDK Key
- Log in to your Apptrove Panel.
- Select your application, click the Action button, and log in.
- In the Dashboard, click the SDK Integration option on the left side of the panel.
- Under SDK Integration, locate and copy the SDK Key.
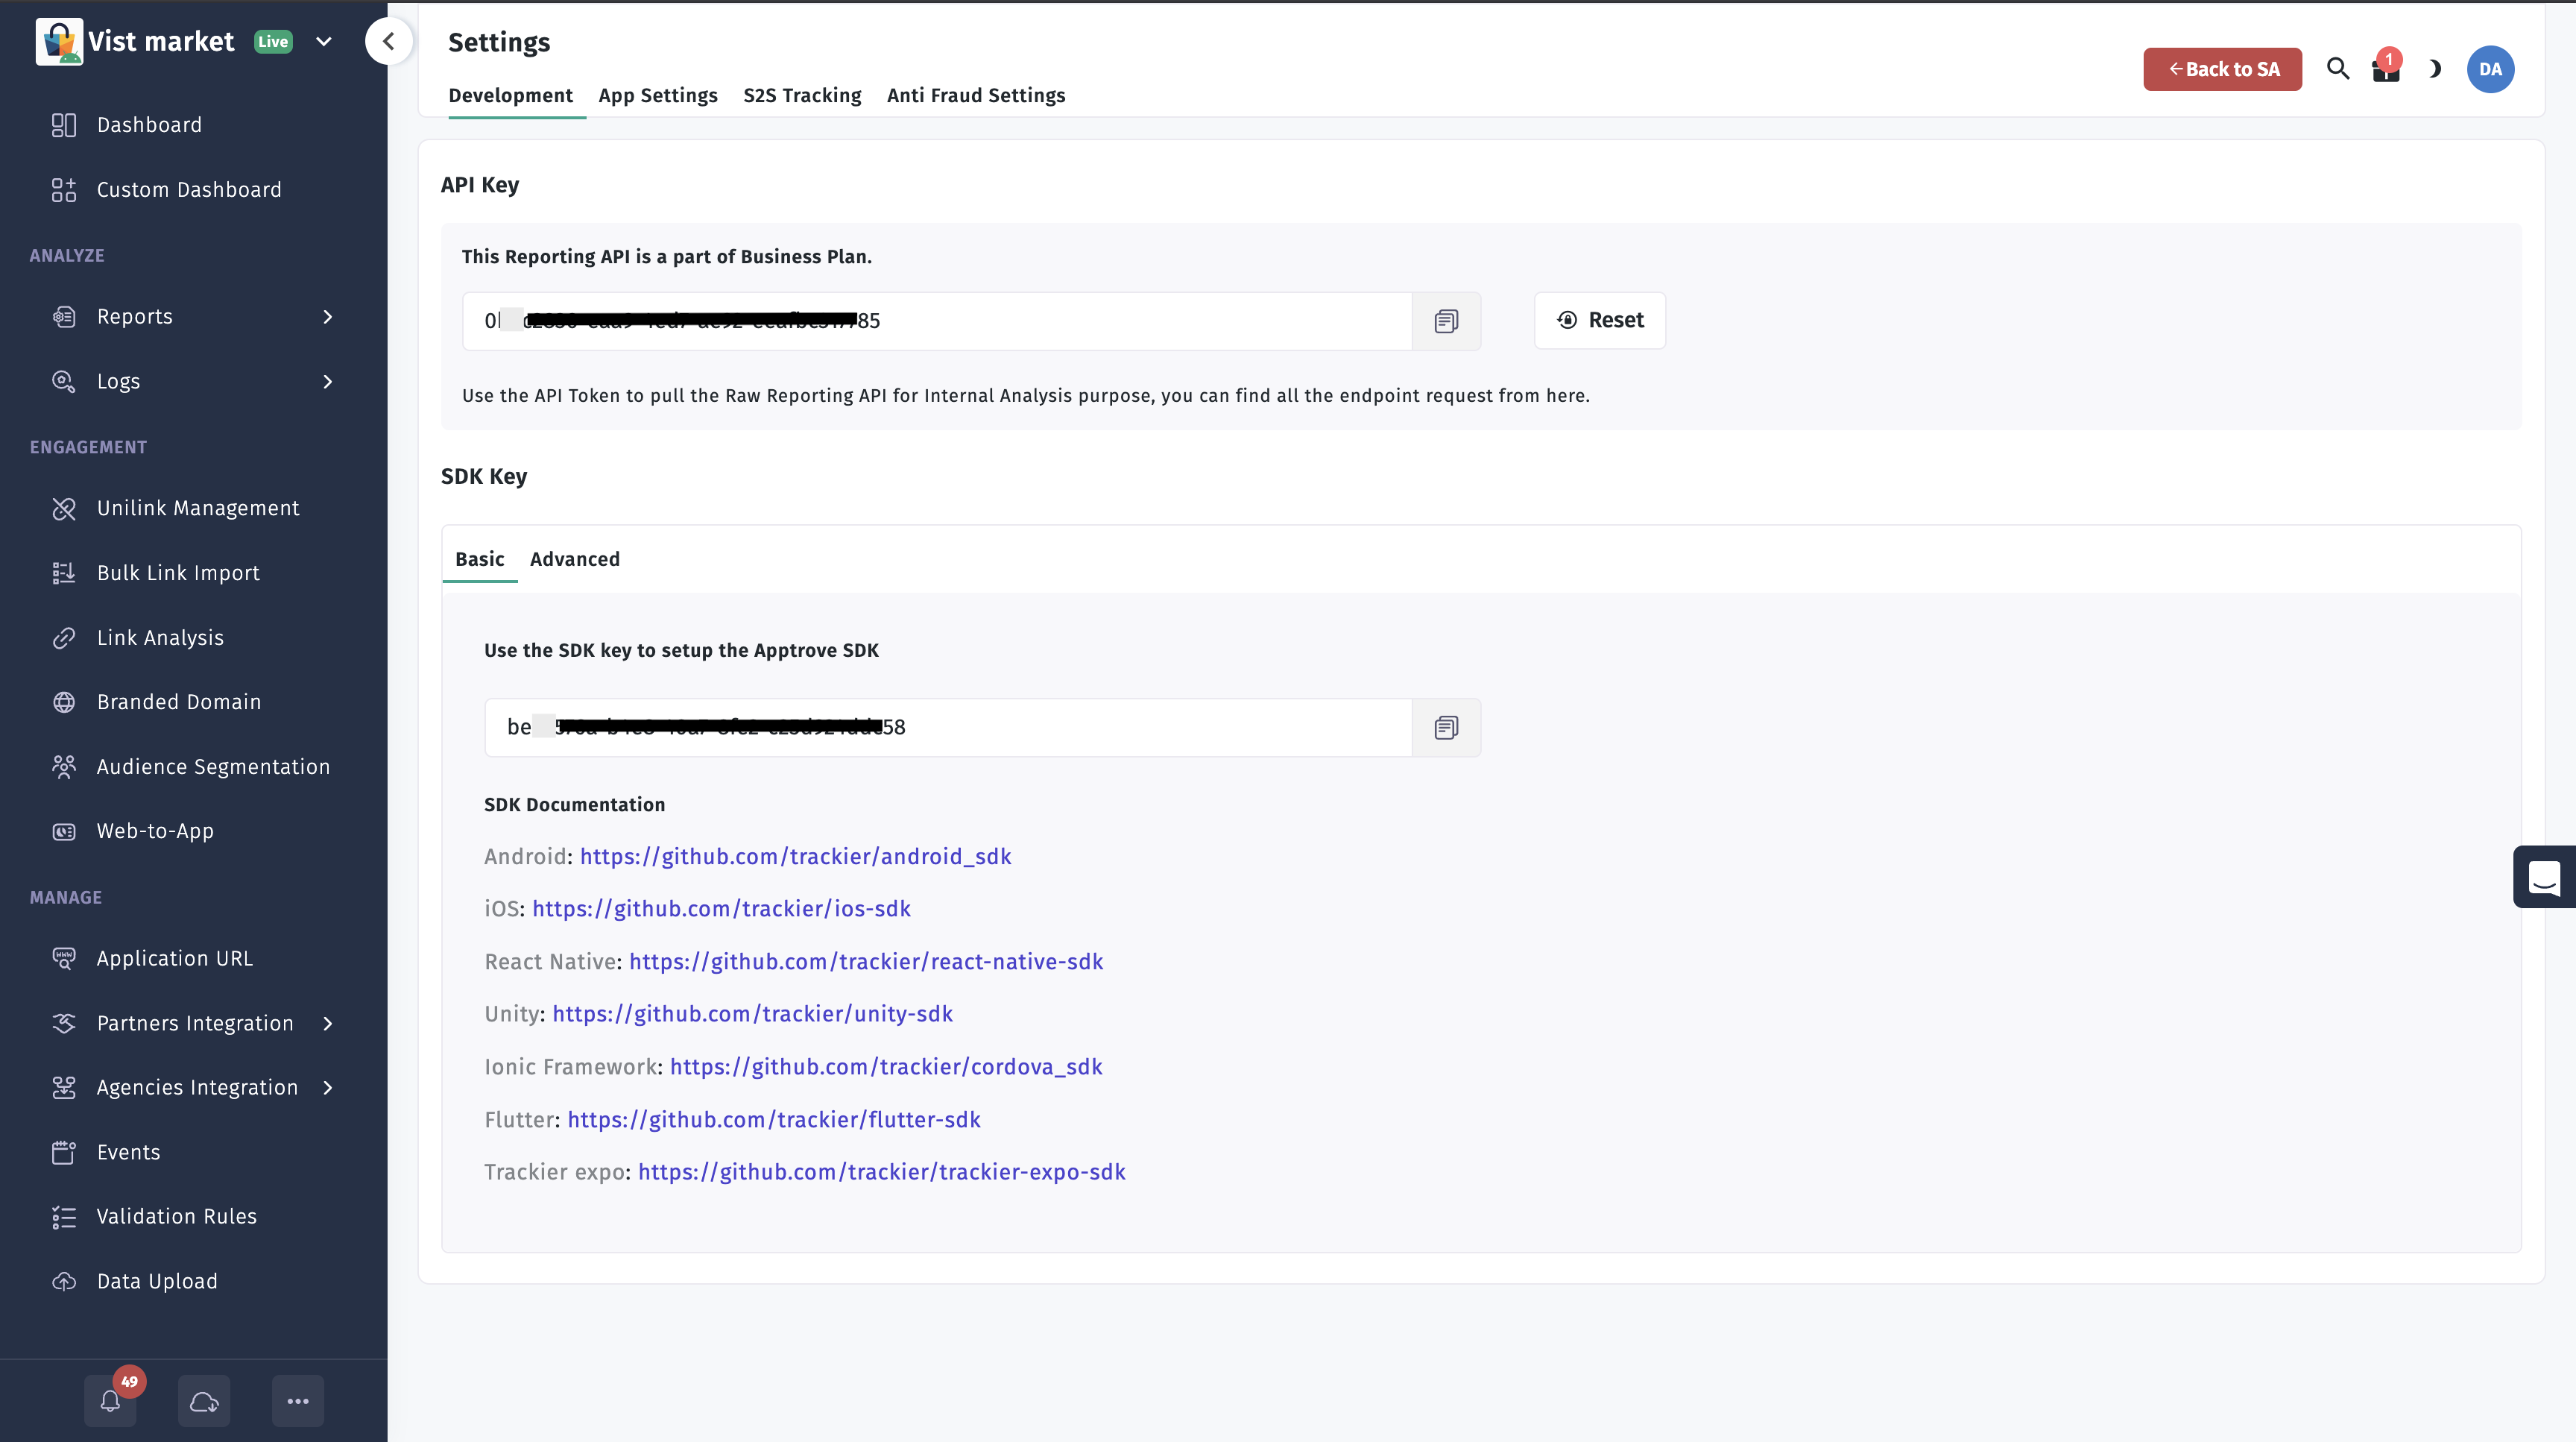
Using the correct SDK key is critical. An incorrect key may cause attribution and reporting issues.
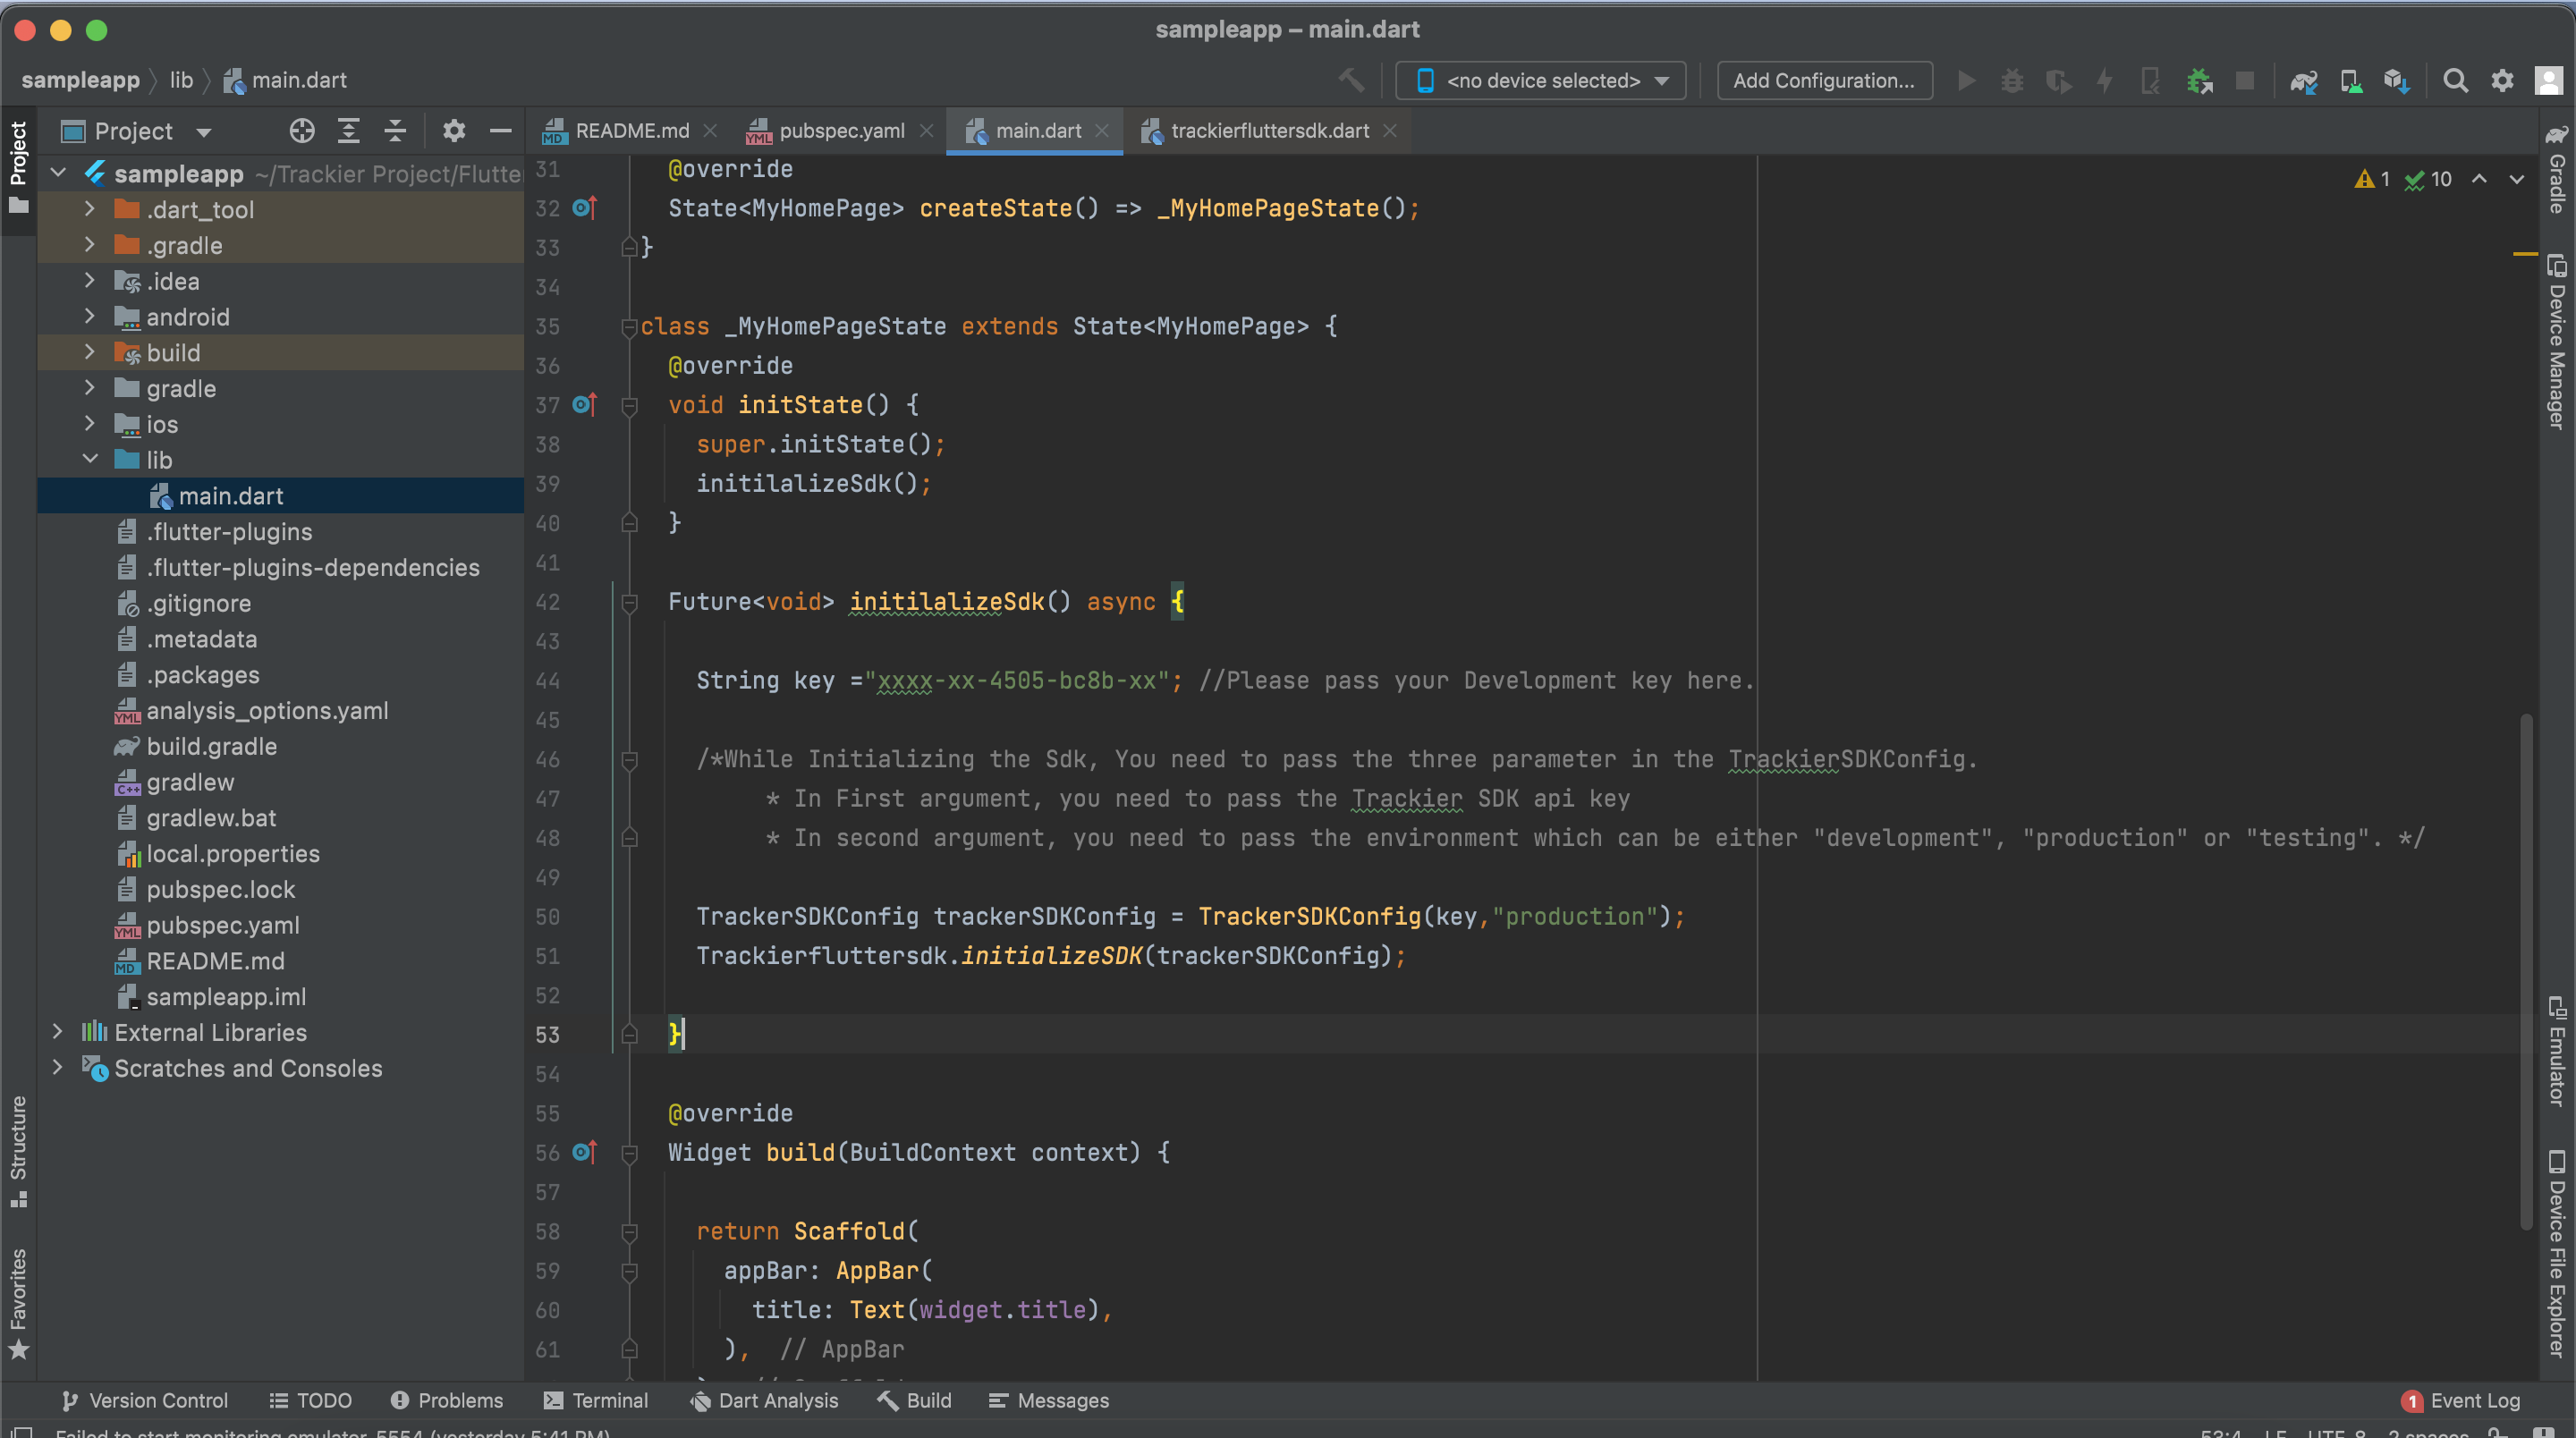
Step 2: Initialize the SDK
Initialize the Apptrove SDK in the initState() method of your main.dart class to ensure it loads during app startup.
- ✓ Apptrove SDK (Recommended)
- Trackier SDK (Deprecating August 2026)
import 'package:apptrove_sdk_flutter/apptrove_sdk_flutter.dart';
class _MyHomePageState extends State<MyHomePage> {
void initState() {
super.initState();
initializeSdk();
}
Future<void> initializeSdk() async {
String key = "xxxx-xx-4505-bc8b-xx"; // Your Apptrove SDK key
/* AppTroveSDKConfig: pass SDK key and environment
* ("development", "production", or "testing") */
AppTroveSDKConfig config = AppTroveSDKConfig(key, "production");
config.setAndroidId(" User Android Id "); // Optional, Android only
AppTroveFlutterSdk.initializeSDK(config);
}
}
import 'package:trackier_sdk_flutter/trackier_sdk_flutter.dart';
class _MyHomePageState extends State<MyHomePage> {
void initState() {
super.initState();
initializeSdk();
}
Future<void> initializeSdk() async {
String key = "xxxx-xx-4505-bc8b-xx"; // Please pass your Development key here.
/* While Initializing the Sdk, You need to pass the two arguments in the TrackierSDKConfig.
* In First argument, you need to pass the Apptrove SDK api key
* In second argument, you need to pass the environment which can be either "development", "production" or "testing". */
TrackerSDKConfig trackerSDKConfig = TrackerSDKConfig(key, "production");
trackerSDKConfig.setAndroidId(" User Android Id "); // Optional And Only for Android
Trackierfluttersdk.initializeSDK(trackerSDKConfig);
}
}
Parameters
- key: Your SDK key from the Apptrove Panel.
- environment: Environment setting. Use:
"development"for testing."production"for release builds."testing"for staging environments.
Ensure the SDK key matches your application in the Apptrove Panel to avoid attribution and reporting issues.
Step 3: Associate User Info (Optional)
You can associate user information (e.g., User ID, Email) during SDK initialization to enhance tracking and attribution.
- ✓ Apptrove SDK (Recommended)
- Trackier SDK (Deprecating August 2026)
void userDetails() {
  /* Passing the UserId and User EmailId Data */
  AppTroveFlutterSdk.setUserId("XXXXXXXX"); // Pass the UserId values here
  AppTroveFlutterSdk.setUserEmail("abc@gmail.com"); // Pass the user email id in the argument

  /* Passing the additional data */
  var userDetails = Map<String, Object>();
  userDetails["name"] = "abcd"; // You can pass the Username data
  userDetails["mobile_number"] = "872xxxxx87"; // You can pass user mobile number
  AppTroveFlutterSdk.setUserAdditionalDetails(userDetails);
}
void userDetails() {
  /* Passing the UserId and User EmailId Data */
  Trackierfluttersdk.setUserId("XXXXXXXX"); // Pass the UserId values here
  Trackierfluttersdk.setUserEmail("abc@gmail.com"); // Pass the user email id in the argument

  /* Passing the additional data */
  var userDetails = Map<String, Object>();
  userDetails["name"] = "abcd"; // You can pass the Username data
  userDetails["mobile_number"] = "872xxxxx87"; // You can pass user mobile number
  Trackierfluttersdk.setUserAdditonalDetail(userDetails);
}
Available Methods
setUserId(String): Unique user identifier.setUserEmail(String): User's email address.setUserAdditionalDetails(Map<String, Object>): Custom key-value pairs for extra metadata (e.g., name, mobile number).
Best Practices
- Initialize Early: Place initialization in
initState()to capture all app launches. - Use Correct Environment: Set
"testing"or"development"during testing to avoid polluting production data. Switch to"production"for release builds. - Verify SDK Key: Ensure the SDK key matches the one in the Apptrove Panel to prevent tracking issues.
- Leverage User Info: Associate user details (e.g., User ID, Email) to improve attribution accuracy.
Troubleshooting
- Incorrect SDK Key: Verify the SDK key matches the one in the Apptrove Panel.
- Initialization Issues: Ensure initialization occurs in
initState()and the SDK is properly added topubspec.yaml. - Environment Mismatch: Confirm the environment (
"testing","development", or"production") aligns with your deployment stage. - User Data Not Recorded: Check that user detail methods (e.g.,
setUserId) are called before tracking events.
For further assistance, refer to the Apptrove Documentation Portal or contact support at support@apptrove.com.