Integrate SDK
Choose your SDK version below:
- Apptrove SDK → Recommended for all projects (Latest: v2.x.x)
- Trackier SDK → Will be deprecated in August 2026 (v1.x.xx)
Use the tabs below to view integration code for your chosen SDK.
This guide provides step-by-step instructions to initialize the SDK in your Android application. It covers retrieving your SDK key, setting up the Application class, and configuring the SDK for different environments.
Initialization
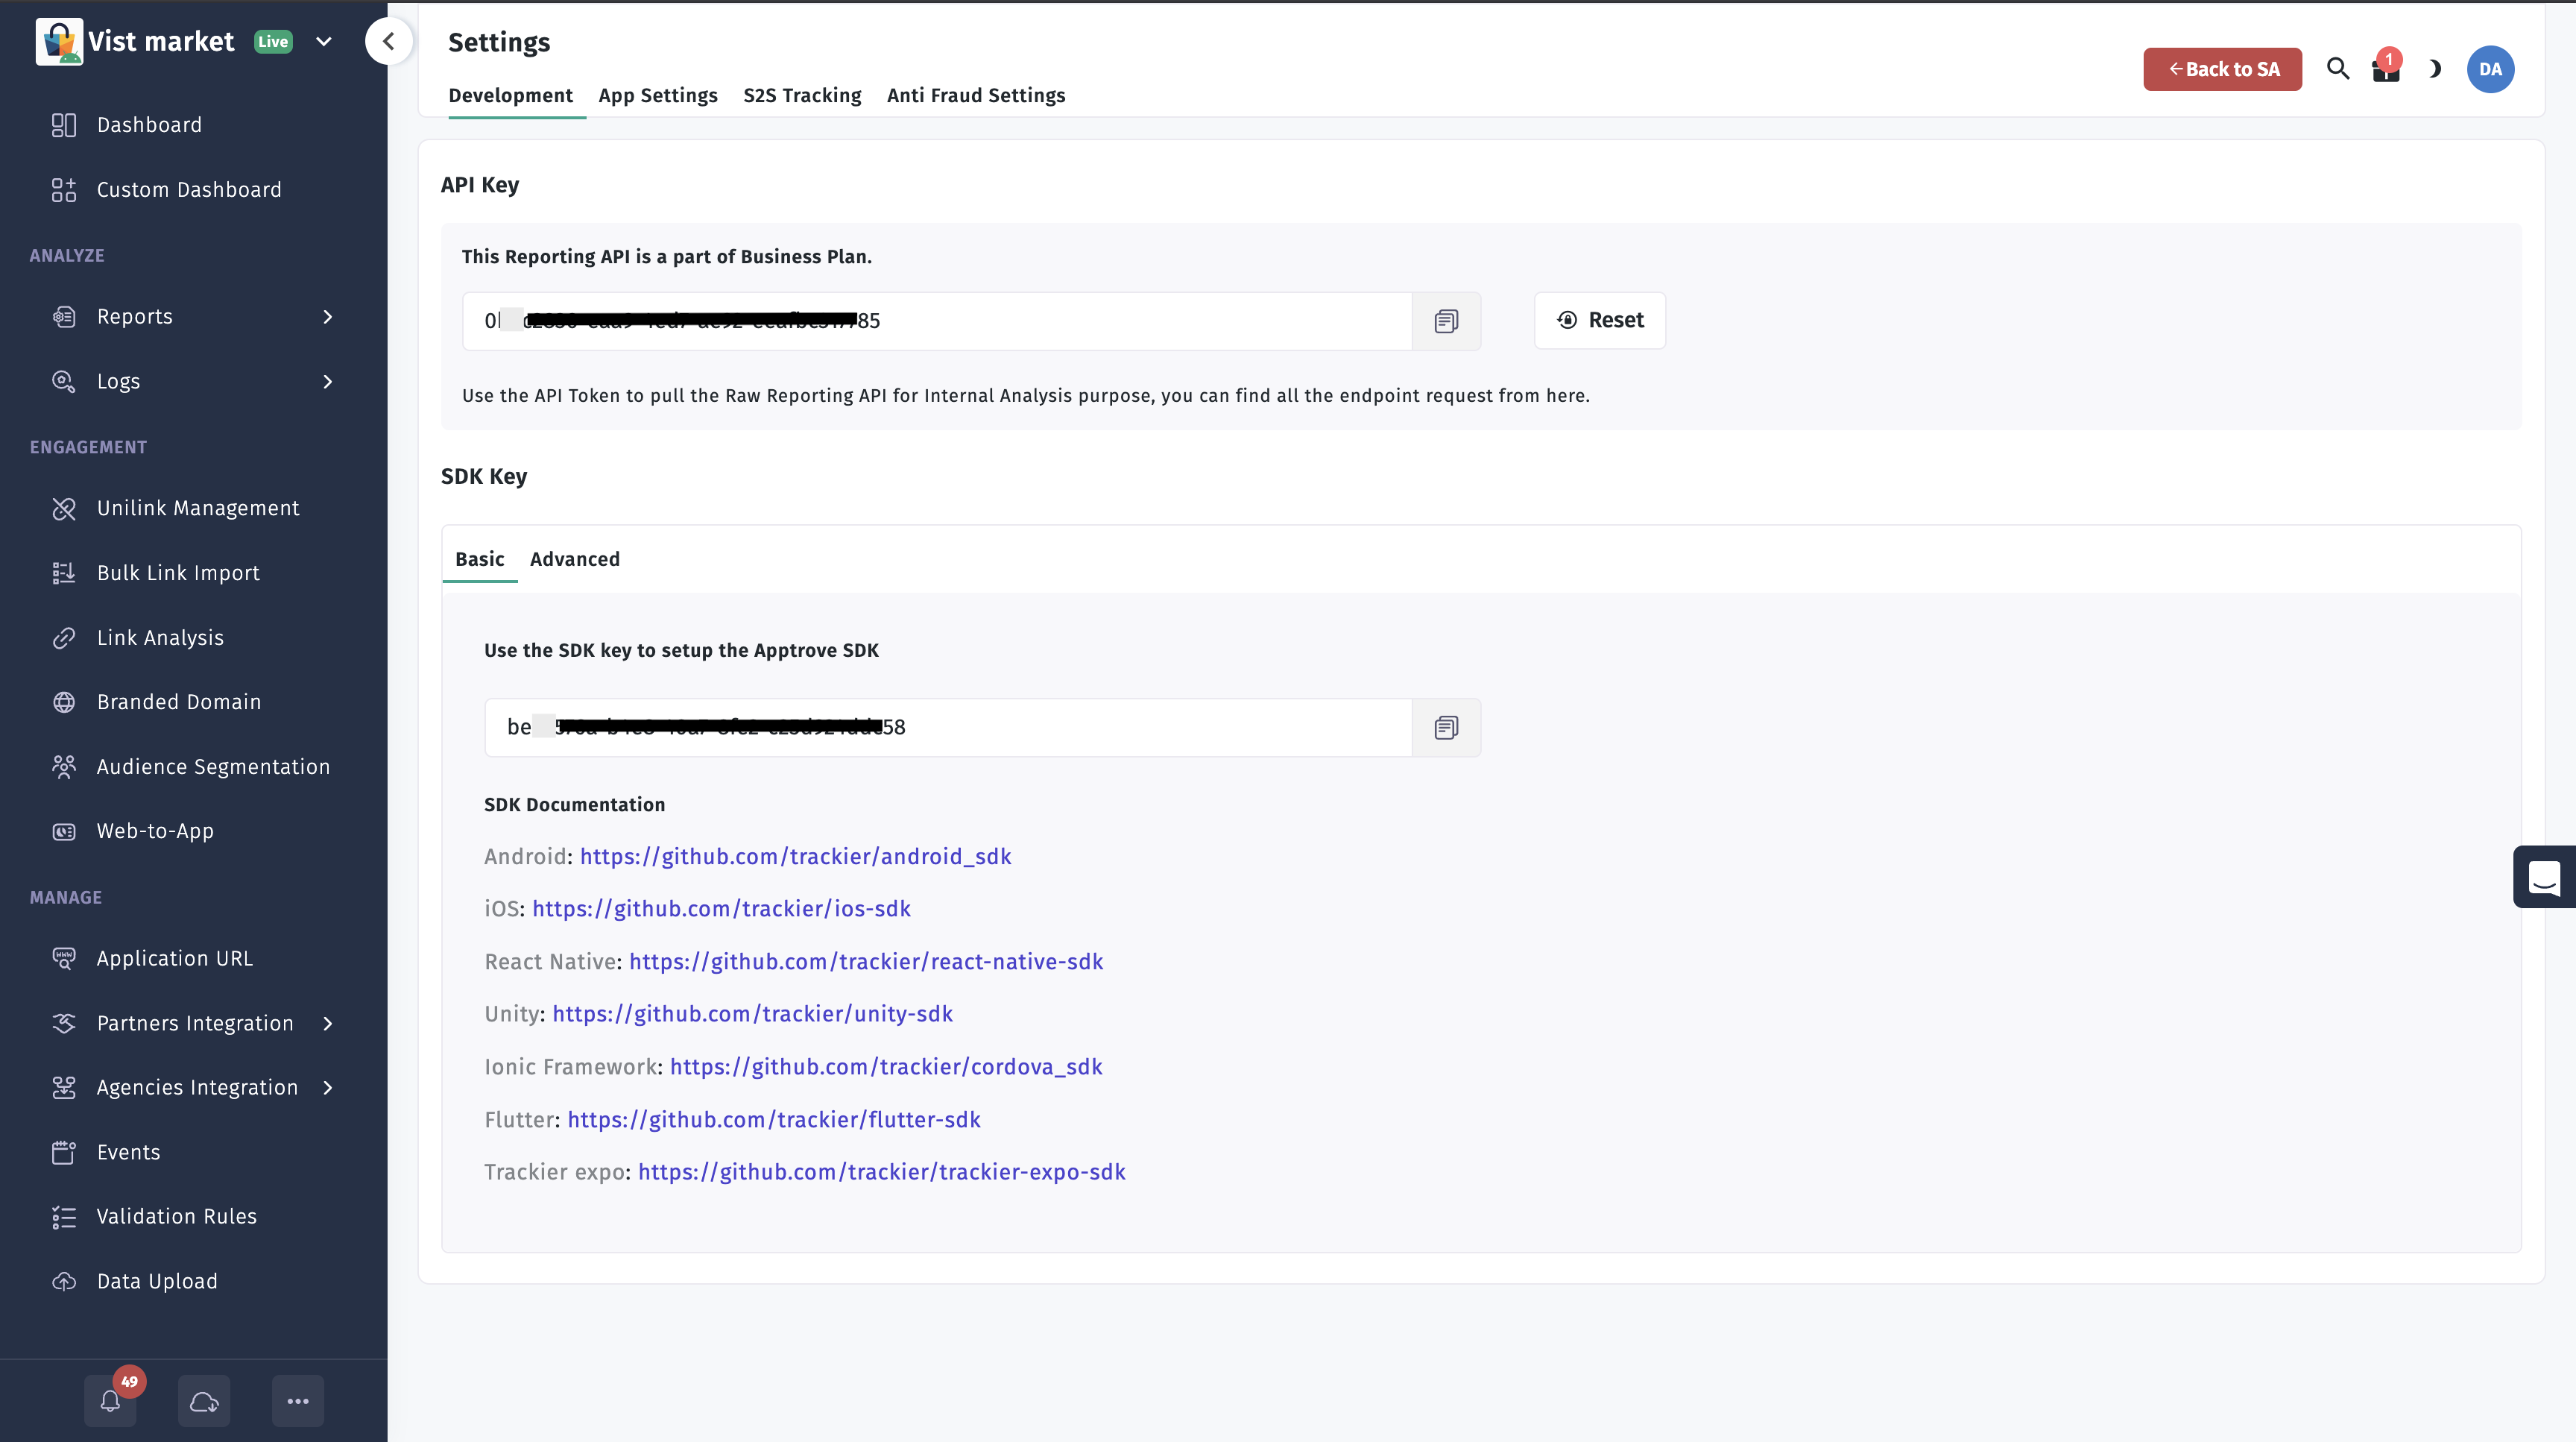
Step 1: Retrieve Your SDK Key
- Log in to your Dashboard
- Select your application
- Navigate to SDK Integration in the dashboard
- Copy the SDK Key displayed
Step 2: Initialize the SDK
We recommend initializing the SDK inside your app's global Application class. This ensures proper initialization in all scenarios, including deep linking.
2.1 Set Up the Application Class
If your project doesn't have an Application class:
- Create a new class that extends
Application - Open your
AndroidManifest.xmlfile - Add the
android:nameattribute to the<application>tag:
<application
    android:name=".MainApplication"
    android:allowBackup="true"
    android:icon="@mipmap/ic_launcher"
    android:label="@string/app_name">

    <!-- Other configuration -->
</application>
2.2 Initialize the SDK
Add the initialization code in your Application class's onCreate() method:
- ✓ Apptrove SDK (Recommended)
- Trackier SDK (Deprecating August 2026)
Package: com.apptrove.sdk.*
- Java
- Kotlin
import com.apptrove.sdk.AppTroveSDK;
import com.apptrove.sdk.AppTroveSDKConfig;

public class MainApplication extends Application {
    @Override
    public void onCreate() {
        super.onCreate();

        final String SDK_KEY = "XXXXXXX-XXXX-XXXX-80e3-5938fadff"; // Your SDK key

        AppTroveSDKConfig sdkConfig = new AppTroveSDKConfig(
            this,               // Application context
            SDK_KEY,            // Your Apptrove SDK key
            "development"       // Environment: "development", "testing", or "production"
        );

        sdkConfig.setAndroidId("User Android Id"); // Optional

        AppTroveSDK.initialize(sdkConfig);
    }
}
import android.app.Application
import com.apptrove.sdk.AppTroveSDK
import com.apptrove.sdk.AppTroveSDKConfig

class MainApplication : Application() {
    override fun onCreate() {
        super.onCreate()

        val SDK_KEY = "xxxx-xx-4505-bc8b-xx" // Your SDK key

        val sdkConfig = AppTroveSDKConfig(
            this,               // Application context
            SDK_KEY,            // Your Apptrove SDK key
            "development"       // Environment: "development", "testing", or "production"
        )

        sdkConfig.setAndroidId("User Android Id") // Optional

        AppTroveSDK.initialize(sdkConfig)
    }
}
Trackier SDK will be deprecated in August 2026
This is the final version. Please migrate to Apptrove SDK before August 2026.
Package: com.trackier.sdk.*
- Java
- Kotlin
import com.trackier.sdk.TrackierSDK;
import com.trackier.sdk.TrackierSDKConfig;

public class MainApplication extends Application {
    @Override
    public void onCreate() {
        super.onCreate();

        final String TR_SDK_KEY = "XXXXXXX-XXXX-XXXX-80e3-5938fadff"; // Your SDK key

        TrackierSDKConfig sdkConfig = new TrackierSDKConfig(
            this,               // Application context
            TR_SDK_KEY,         // Your Trackier SDK key
            "development"       // Environment: "development", "testing", or "production"
        );

        sdkConfig.setAndroidId("User Android Id"); // Optional

        TrackierSDK.initialize(sdkConfig);
    }
}
import android.app.Application
import com.trackier.sdk.TrackierSDK
import com.trackier.sdk.TrackierSDKConfig

class MainApplication : Application() {
    override fun onCreate() {
        super.onCreate()

        val TR_SDK_KEY = "xxxx-xx-4505-bc8b-xx" // Your SDK key

        val sdkConfig = TrackierSDKConfig(
            this,               // Application context
            TR_SDK_KEY,         // Your Trackier SDK key
            "development"       // Environment: "development", "testing", or "production"
        )

        sdkConfig.setAndroidId("User Android Id") // Optional

        TrackierSDK.initialize(sdkConfig)
    }
}
Using the wrong SDK key will impact all traffic sent from the SDK and cause attribution/reporting issues.
Step 3: Configure for Production
When ready to release your app:
- Change the environment parameter to
"production" - Update your log level as needed
- ✓ Apptrove SDK
- Trackier SDK
Java:
AppTroveSDKConfig sdkConfig = new AppTroveSDKConfig(this, SDK_KEY, "production");
Kotlin:
val sdkConfig = AppTroveSDKConfig(this, SDK_KEY, "production")
Java:
TrackierSDKConfig sdkConfig = new TrackierSDKConfig(this, TR_SDK_KEY, "production");
Kotlin:
val sdkConfig = TrackierSDKConfig(this, TR_SDK_KEY, "production")
Next Steps
After completing the initialization:
- Verify your integration by checking for incoming events in the dashboard
- Implement event tracking as needed (refer to the [Event Tracking Guide])
- For assistance, contact support at support@apptrove.com
For complete documentation, visit the Developer Portal.